Assignments > Tutorial 5d: Todo List
Due Mon, 02/23 at 11:59pm
The goal of this exercise is to build a simple todo list from scratch using JavaScript to dynamically add items to the page.
1. Set-up
Please create a new folder inside of tutorial05 called 04-todo-list.
1.1. Create the HTML
Inside of 04-todo-list, create a new index.html file. Then, paste the following starter code into it:
<!DOCTYPE html>
<html lang="en">
<head>
  <meta charset="UTF-8" />
  <meta name="viewport" content="width=device-width, initial-scale=1.0" />
  <title>Todo List</title>
</head>
<body>
  <div class="container">
    <h1>My Todo List</h1>
    <input id="todoInput" type="text" placeholder="Enter a todo item..." />
    <button id="addBtn">Add</button>
    <ul id="todoList"></ul>
  </div>
</body>
</html>
1.2. Add CSS
Create styles.css and add some basic styling:
body {
  font-family: Arial, sans-serif;
  margin: 0;
  padding: 20px;
  background-color: #f4f4f4;
}

body * {
  box-sizing: border-box;
}

.container {
  max-width: 600px;
  margin: 0 auto;
  background: white;
  padding: 20px;
  border-radius: 8px;
  box-shadow: 0 2px 4px rgba(0,0,0,0.1);
}

h1 {
  margin-top: 0;
  color: #333;
}

#todoInput {
  width: 70%;
  padding: 10px;
  font-size: 16px;
  border: 1px solid #ddd;
  border-radius: 4px;
}

#addBtn {
  width: 25%;
  padding: 10px;
  font-size: 16px;
  background-color: #4CAF50;
  color: white;
  border: none;
  border-radius: 4px;
  cursor: pointer;
}

#addBtn:hover {
  background-color: #45a049;
}

#todoList {
  list-style: none;
  padding: 0;
  margin-top: 20px;
}

#todoList li {
  padding: 12px;
  background-color: #f9f9f9;
  margin-bottom: 8px;
  border-radius: 4px;
  border-left: 4px solid #4CAF50;
}
1.3. Connect Your Stylesheet
Link the stylesheet you just made in <head>:
<link rel="stylesheet" href="styles.css" />1.4. Preview the starter code
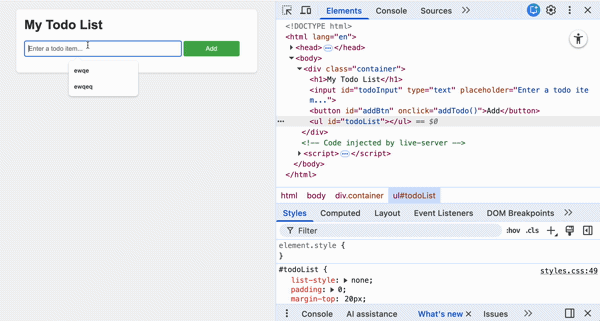
Now, preview index.html in the browser (using Live Server). You should see a simple form with an input field, a button, and an empty list below.
In the next section, you will add JavaScript to make the button functional so that when clicked, it takes the text from the input and adds it as a new item in the list.
2. Add JavaScript
Create index.js, link it in <head>, and create a function to add todo items.
2.1. Create and link your JavaScript
Create a new file called index.js. Then link it to your HTML within the <head> tag:
<script src="index.js" defer></script>2.2. Create the addTodo() function
Create a new addTodo() function that:
- Gets the value from the input field with id
todoInput - Uses
insertAdjacentHTML('beforeend', string)to add a new<li>element to the<ul>with idtodoList - Clears the input field after adding the item
Skeleton to guide you:
function addTodo() {
  // 1) Get the input element
  // 2) Get the value from the input (use .value property)
  // 3) Get the ul element (the todo list)
  // 4) Use insertAdjacentHTML('beforeend', '<li>...</li>') to add the item
  //    Make sure to include the todo text in the <li>
  // 5) Clear the input field (set .value to empty string)
}
Important notes:
- To get the value from an input element, use the
.valueproperty:inputElement.value - To use
insertAdjacentHTML, you need to create an HTML string. For example:'<li>Buy groceries</li>' - The
'beforeend'position means the new HTML will be added at the end of the element (inside, after all existing content)
2.3. Attach the function to the button
In your HTML file, add the onclick attribute to the button to call your function when clicked:
<button id="addBtn" onclick="addTodo()">Add</button>Important: We are using the onclick attribute directly in the HTML, not addEventListener in JavaScript. This is a simpler way to attach event handlers.
2.4. Test
- Open your page in the browser.
- Type a todo item in the input field (e.g., “Buy groceries”).
- Click the “Add” button.
- Verify that the item appears in the list below.
- Try adding multiple items to make sure they all appear.
Hints / Quick Cheatsheet: Form Values & insertAdjacentHTML
Accessing Form Element Values
// Get an input element by ID
const input = document.querySelector('#todoInput');

// Get the value from an input element
const userText = input.value;

// Set the value of an input element (clear it)
input.value = '';

// Example: Get value and clear input
const todoText = document.querySelector('#todoInput').value;
document.querySelector('#todoInput').value = '';
Using insertAdjacentHTML
The insertAdjacentHTML() method inserts HTML text into the DOM at a specified position.
// Get the element where you want to insert HTML
const todoList = document.querySelector('#todoList');

// Insert HTML at different positions:
// 'beforebegin' - Before the element (outside, as a sibling)
// 'afterbegin' - At the beginning (inside, before first child)
// 'beforeend' - At the end (inside, after last child) ← Most common
// 'afterend' - After the element (outside, as a sibling)

// Add an item to the end of a list (most common for todo lists)
todoList.insertAdjacentHTML('beforeend', '<li>Buy groceries</li>');

// Add an item at the beginning of a list
todoList.insertAdjacentHTML('afterbegin', '<li>First item</li>');

// Using a variable in the HTML string
const itemText = 'Walk the dog';
todoList.insertAdjacentHTML('beforeend',  '<li>' + itemText + '</li>');