1. Planning and Wireframing
Due Fri, 04/24 at 11:59pm
← Review the Final Project Overview
Overview
In this stage, you will decide what you are building before you code the full app.
This part is about:
- choosing a clear app idea
- planning your API
- sketching your screens
- showing what the app might look like
- explaining your design choices
Return to the Final Project overview for the full project scope, starter ideas, and core requirements.
You will submit a copy of the proposal document (see below) to Moodle as either a Word document or PDF file.
1. App Concept
Write a short description of your app. Explain:
- what the app is for
- who the user is
- what the primary user action will be
- what kind of data the app will store or display
Need help starting your app concept?
You can use this sentence starter:
My app is called ____. It helps users ____. The main thing a user will do is ____. The app will store or display ____.
PhotoApp example:
My app is called PhotoApp. It helps users organize and manage their photos. The main thing a user will do is log in, view photos in their feed, and bookmark / like /comment on photos. The app will store photo titles, captions, comments, stories, and user profile data.
Keep this short. You do not need to describe every feature yet.
2. Endpoint Design
Design at least 2 API resources for your app using the REST API server code from Tutorial 11 (api-generator). Your resources should support CRUD operations for your main data.
When you’re done, copy the api.config.yaml code into the Google doc. Make sure your API design includes the data needed to support your app.
Need help thinking about endpoints?
Each resource in api.config.yaml has a path and operations. The generator turns those operations into HTTP routes (for example, list → GET on the collection, create → POST, retrieve → GET with an id, update → PATCH, delete → DELETE).
Example HTTP routes you might end up with:
GET /api/photos= get photo records for the app or current user, depending on your designPOST /api/photos= create a new photo recordPATCH /api/photos/:id= update one photoDELETE /api/photos/:id= delete one photo
PhotoApp example resources:
photosbookmarkscomments
If you are not sure what to include, start by listing the main kinds of data your app needs.
3. Wireframes
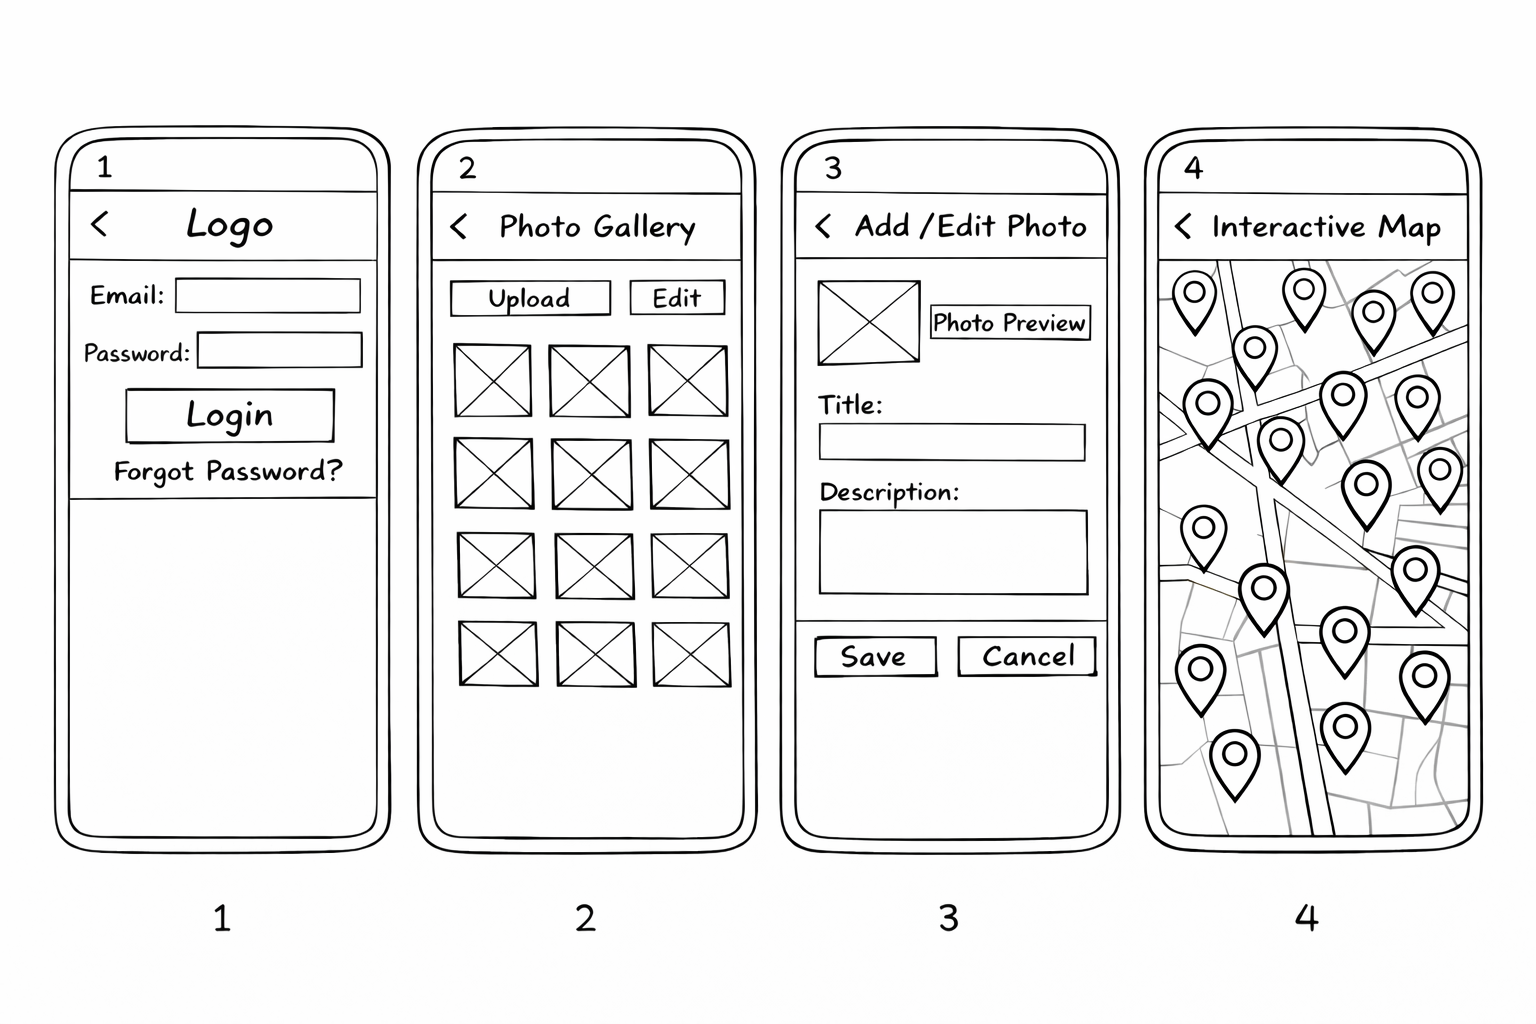
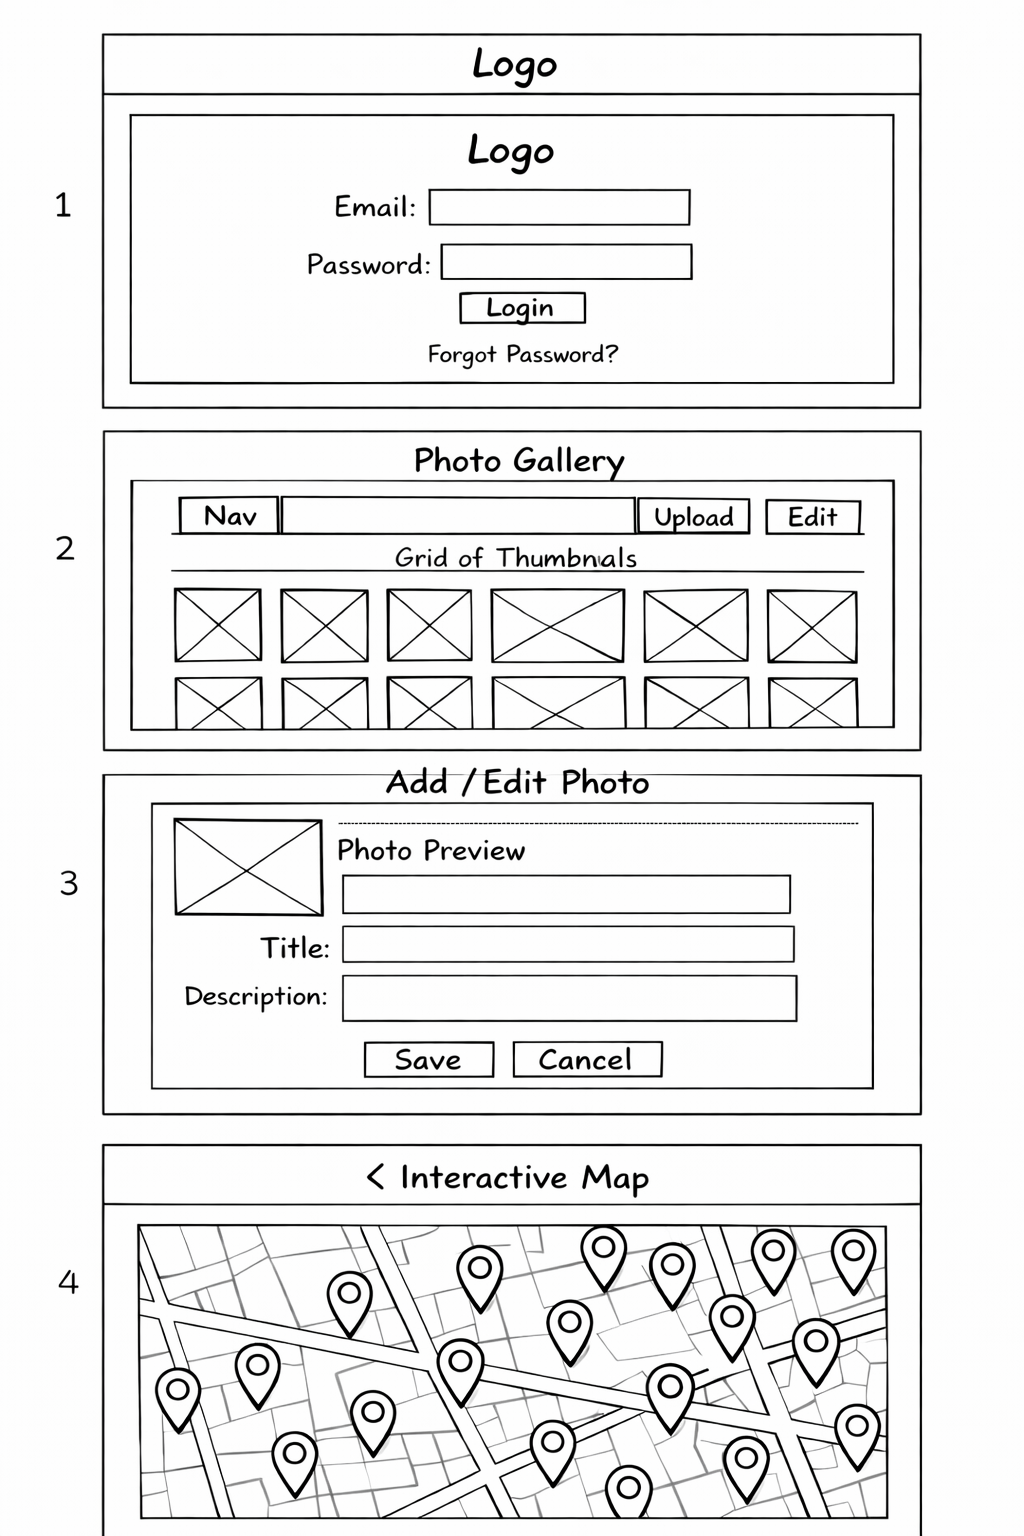
Create wireframes for 4 screens:
-
Login Screen
- shows login form (e.g., email + password)
-
List View
- shows a list or grid of your main resource
- includes a way to create or edit items
-
Add / Edit View
- shows a form to create or update an item
-
Data Visualization View
- shows the same data in a different way (e.g., chart or map)
Rules
- Grayscale only (no color)
- Boxes + text labels only
- Focus on layout, hierarchy, and flow, not styling
- Consider both mobile and desktop layouts
- Think about how your screens enable users to create, edit, and delete data.
- Make sure the screens connect into a clear user flow (e.g., login → list → edit → visualization).
Sample Wireframe
PhotoApp wireframe example (Mobile):
PhotoApp wireframe example (Desktop):
4. High-Fidelity Mockup (Colors and Fonts)
Create a styled version of one of your wireframes. Start by copying your wireframe to a new page, then:
- keep the same layout
- replace boxes and labels with realistic UI elements
- add colors, fonts, and text styles
- adjust spacing and alignment so the screen feels clear and organized
Your mockup should show:
- your color choices
- your typography (fonts and sizes)
- what buttons, forms, and UI elements look like
- how the screen is visually organized
Rules
- Do not rely on color alone to communicate meaning
- Design choices should make the app easier to use
5. Design Rationale (Short Written Response)
Write a short explanation (4–6 sentences) of your design decisions. Good responses connect design decisions to how a user completes the main task.
Focus on why you made your choices.
Address at least 2–3 of these:
- What should the user notice first? Why?
- How does your layout support the main task?
- Why are key actions placed where they are?
- How do color and typography help?
- How does your design make the app easier to use?
Stage 1 Submission
Before you submit, make sure you have all of the following. Stage 1 is worth 50 points total. Submit a PDF or Word document of your Google Doc to Moodle.
| Points | Name of Task | Description of Task | Section | |
|---|---|---|---|---|
| 5 | App concept description | A short app concept description explains what your app does, who it is for, and what the main user action is. | 1. App Concept | |
| 10 | API plan | An API plan includes at least 2 resources (the api.config.yaml file from Tutorial 11). |
2. Endpoint Design | |
| 25 | Wireframes | You created the required 4 wireframes in Figma for both Desktop and Mobile. | 3. Wireframes | |
| 5 | Styled mockup | A styled mockup is based on one of your wireframes and shows your visual design choices. | 4. Visual Design | |
| 5 | Explain your design choices | A short explanation of your design choices. | 5. Design Rationale |