Assignments > HW3: Javascript: Make a Photo Carousel
Due on Wed, 02/15 @ 11:59PM. 20 Points.
Collaboration and Code Sharing Policy: Read Carefully
Like in HW2, you are welcome to work in pairs (optional). Even if you collaborate with someone else, you must still submit your own files on Moodle. If you collaborate, you’ll just list your partner in the comments section of Moodle.
I will be running MOSS on all assignments to ensure that everyone is doing their own work in good faith. For those who are collaborating, this is a way to be transparent about collaboration ahead of time (so if you happen get a code similarity flag via MOSS, we will ignore it). That said, please do not (a) “free ride” on your teammates or (b) enable free riders. Everyone in your group should understand every line of code they submit.
In this assignment, we will be building a photo carousel from scratch. While there are a million carousel widgets out there, the goal of this assignment is not to simply “build a carousel” but understanding how to use HTML, CSS, and JavaScript together to build any interactive interface that you want.
General Approach
To build our carousel, will take the following approach (note that there are many valid approaches to achieving this goal):
- Create an outer container with a set width (e.g.,
width: 50vw;). - Create an inner container that contains all of the slides (photos & captions), arranged horizontally so they end up going offscreen.
- To do this, you simply set the display to
flexand all of the child items will be arranged on the same row by default.
- To do this, you simply set the display to
- Create two buttons. Assign each button a click event handler that adjusts the left position of the inner container (just like old filmstrips used to work), using JavaScript.
- In order to set the left position relative to the parent container, the
positionof the inner container needs to be set torelative(already done for you, but FYI). - If the user gets to the end of the strip, the left position jumps back to the beginning.
- In order to set the left position relative to the parent container, the
Please take a look a the animations below to get a sense of the technique:
The “Window” Technique
Note that the outer container – with the class of “carousel” – represents the view window, and the left position of the inner container – with the class of “carousel-inner” – changes:
Final Product
In the “final version”, the view window’s overflow property is set to “hidden” so that you only see the current picture:
1. Set Up
Download the hw03 (starter) files and save them to your csci344/homework folder. Then, open the entire hw03 folder in VS Code.
Before you begin, get familiar with the starter files:
index.html
Note that there are links to styles.css and carousel.js in the <head></head> tag. Note that there is also a carousel “skeleton”:
<div class="carousel" aria-label="Photo Carousel">

    <div class="carousel-inner">
        <!-- Insert images here -->
    </div>

    <button class="back" aria-label="Show previous slide">
        <i class="fa-solid fa-chevron-left"></i>
    </button>

    <button class="forward" aria-label="Show next slide">
        <i class="fa-solid fa-chevron-right"></i>
    </button>

</div>
carousel.js
The only thing that has been defined for you here is an array of objects, where each object represents one “slide” of the carousel:
const data = [
  {
    image_url: "https://picsum.photos/450/300?n=1",
    caption: "Photo 1",
  },
  {
    image_url: "https://picsum.photos/450/300?n=2",
    caption: "Photo 2",
  },
  {
    image_url: "https://picsum.photos/450/300?n=3",
    caption: "Photo 3",
  },
  {
    image_url: "https://picsum.photos/450/300?n=4",
    caption: "Photo 4",
  },
  {
    image_url: "https://picsum.photos/450/300?n=5",
    caption: "Photo 5",
  },
  {
    image_url: "https://picsum.photos/450/300?n=6",
    caption: "Photo 6",
  },
  {
    image_url: "https://picsum.photos/450/300?n=7",
    caption: "Photo 7",
  },
  {
    image_url: "https://picsum.photos/450/300?n=8",
    caption: "Photo 8",
  },
  {
    image_url: "https://picsum.photos/450/300?n=9",
    caption: "Photo 9",
  },
  {
    image_url: "https://picsum.photos/450/300?n=10",
    caption: "Photo 10",
  }
];
You will loop through this data in order to create individual slides.
styles.css
This file is pretty straightforward, and styles the carousel (you shouldn’t have to worry about any CSS edits for this homework assignment).
One new thing here: note the use of CSS variables. This can sometimes simplify your CSS code further (though most modern front-end shops use CSS generator languages like SCSS or SASS).
Notes
- You are welcome to use any images that you want, and to make this exercise your own — the more you customize and explore, the more you will learn!
- You are also welcome to edit the HTML and CSS as you like (though this is not required).
2. Your Tasks
After inspecting the starter code, please complete the following tasks by editing carousel.js:
1. Add slides to the inner container
- Create a function called
loadSlides.- The function should accept 1 argument called photoList, which will hold an array of photo objects.
- Inside the function body, use a loop to iterate through each photo object in the photoList array. For each iteration, insert a “slide” into the
<div class="carousel-inner"></div>element, conforming to the HTML structure shown below (but the data should be different for each slide): - The paragraph text and the alt text should correspond to the “caption” data field.
- The
srcattribute should correspond to the “image_url” data field.
- When you’re done, invoke your
loadSlidesfunction as follows:loadSlides(data);
<section class="slide" role="group" aria-label="Slide 1 of 10">
    <img src="https://picsum.photos/600/400?n=1" alt="Photo 1">
    <p>Photo 1</p>
</section>
Tips
- Use a template literal
- Use the
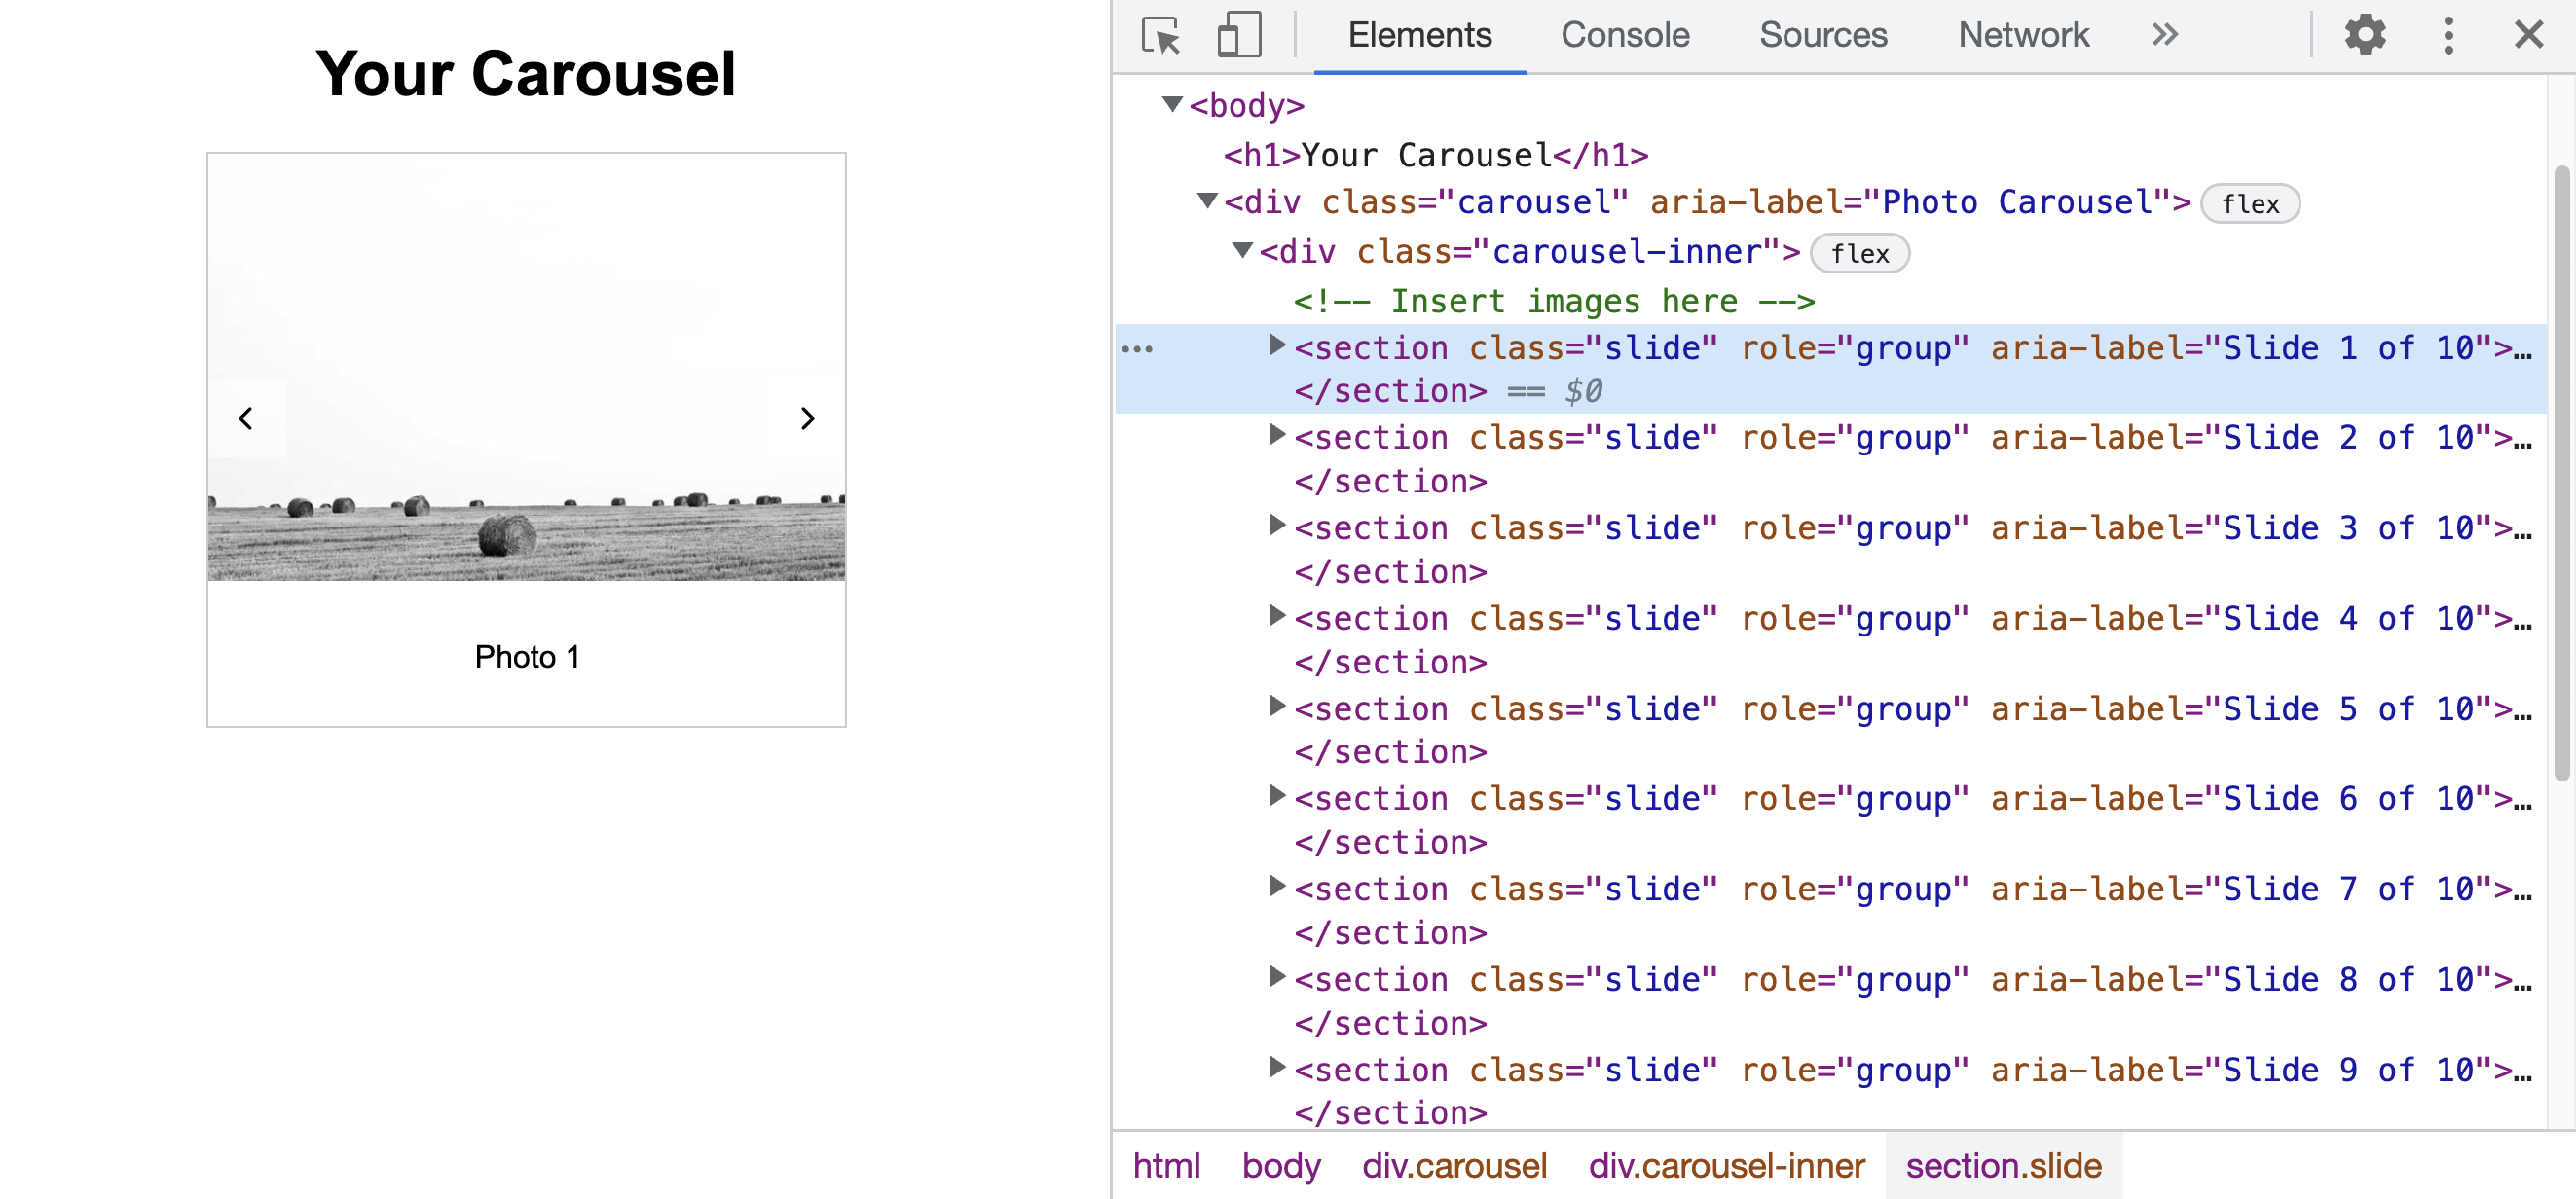
insertAdjacentHTMLmethod (see examples from lecture)- If you did it correctly, you should see 10 section tags inside of your
<div class="carousel-inner"></div>when you use the browser inspector (see screenshot below).
2. Implement the “next” and “previous” click event handlers
When you’re done with Step 1, implement the “next” and “previous” click event handlers:
Next Button
- When the right arrow (next button) is clicked, the next image (in list of photo objects) should be displayed.
- If the last image in the list is showing and the next button is clicked, the carousel should show the first image in the list again (as shown in the video above).
Previous Button
- When the left arrow (previous button) is clicked, the previous image (in list of photo objects) should be displayed.
- If the first image in the list is showing and the previous button is clicked, the carousel should show the last image in the list again (as shown in the video above).
Tips
- You will need to create two functions:
next()andprevious().- You will need to connect each function to the corresponding button’s click event.
- Use a variable to track the index position of the image that is currently being displayed (so that you know which image to show next).
- To show a new image in the carousel, you need to adjust the left position of the “inner carousel” (as shown in the video above).
3. Attach a “next” click event handler to each image
Add a click event handler to each image so that when you click on the image, it also advances the carousel to the next slide.
- One way of doing this is to add the event handler directly to
imgtag in the template literal that you made in yourloadSlidesfunction.
4. Accessibility
Help a screen reader interpret your carousel by making the following changes:
- Set the
aria-hiddenattribute to “true” to any slide (section tag) that is not currently being displayed (aria-hidden="true"). - Set the
aria-hiddenattribute to “false” to the current slide (aria-hidden="false"). - Add aria labels to the “next” and “previous” buttons so that it is clear to the screen reader what the button does
- This has already been done for you in the starter code, but note how it is done.
- Use
role="group"and a numbered aria-label (likearia-label="slide 1 of 10") on each individual slide (section tag) so screen reader users can easily tell where each slide begins and ends and where they are in the set.- This should be done in the template literal that you made in your
loadSlidesfunction.
- This should be done in the template literal that you made in your
Tips
- To make each slide easier to target, consider giving each slide a unique id (so you can use
document.querySelectorto access and modify aria elements).- You can set any element’s attribute like this:
document.querySelector("some_selector").setAttribute("name", "value");- You can verify that you did the accessibility part correctly by watching the following videos:
If you want, you can read more about accessibility for carousels here.
3. Submit
Please consult the rubric below to ensure you have met the requirements for this assignment (all of the tasks with checkmarks next to them):
| Component / Task | Subtasks | Points |
|---|---|---|
| 1. Generated the slides | see requirements | 5 pts |
| 2. Implemented the "next" and "previous" buttons | see requirements | 5 pts |
| 3. Added the next() click event handler to each carousel image | see requirements | 2 pts |
| 4. Added accessibility features | see requirements | 8 pts |
| Total | 20 pts |
Then, when you’re done, please submit a zipped folder on the Course Moodle called hw03.zip that contains the following (completed) files:
- Your
index.htmlfile - Your
styles.cssfile - Your
carousel.jsfile
If you collaborated with a partner, please name your partner as a comment on Moodle.