Activity: Deploying to Heroku
Intro to Heroku
Heroku is a container-based cloud Platform as a Service (PaaS) that is owned by Salesforce. You can use Heroku to publish many different kinds of web development projects (not just Python, Node, React, etc.). Essentially, Heroku allows you to configure a virtual computer on someone else’s machine, and then save and run your files there. The basic process is as follows:
- Create a new Heroku app (i.e. “dyno”)
- Create a hosted database (a cloud version of your database)
- Configure your app – by create a few different configuration files and variables. Specifically:
- Create a
requirements.txtfile (for installing python packages) - Create a
Procfileto tell Heroku that we want to run a Flask web server using Gunicorn - Create a
package.jsonfile to teach Heroku how to compile your React app. - Set some environment variables that tell Heroku how to access your database and JWT Secret
- Create a
- Deploy your app by downloading and configuring the Heroku Command Line Interface (CLI). Heroku’s CLI, in combination with git, helps you send your files to Heroku.
Heroku also has support for hosting PostgreSQL databases, which is a free service if you register as a student. Also, if you have the free version, it goes to sleep if it hasn’t been used for a while. So the first time you access your Heroku website, it’s a little slow.
Publishing Photo App on Heroku
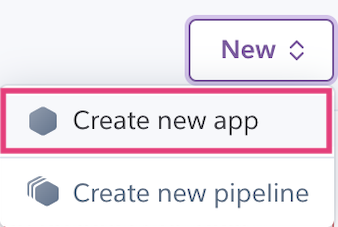
1. Create a Heroku App
Register for Heroku (if you don’t yet have an account): https://signup.heroku.com/.
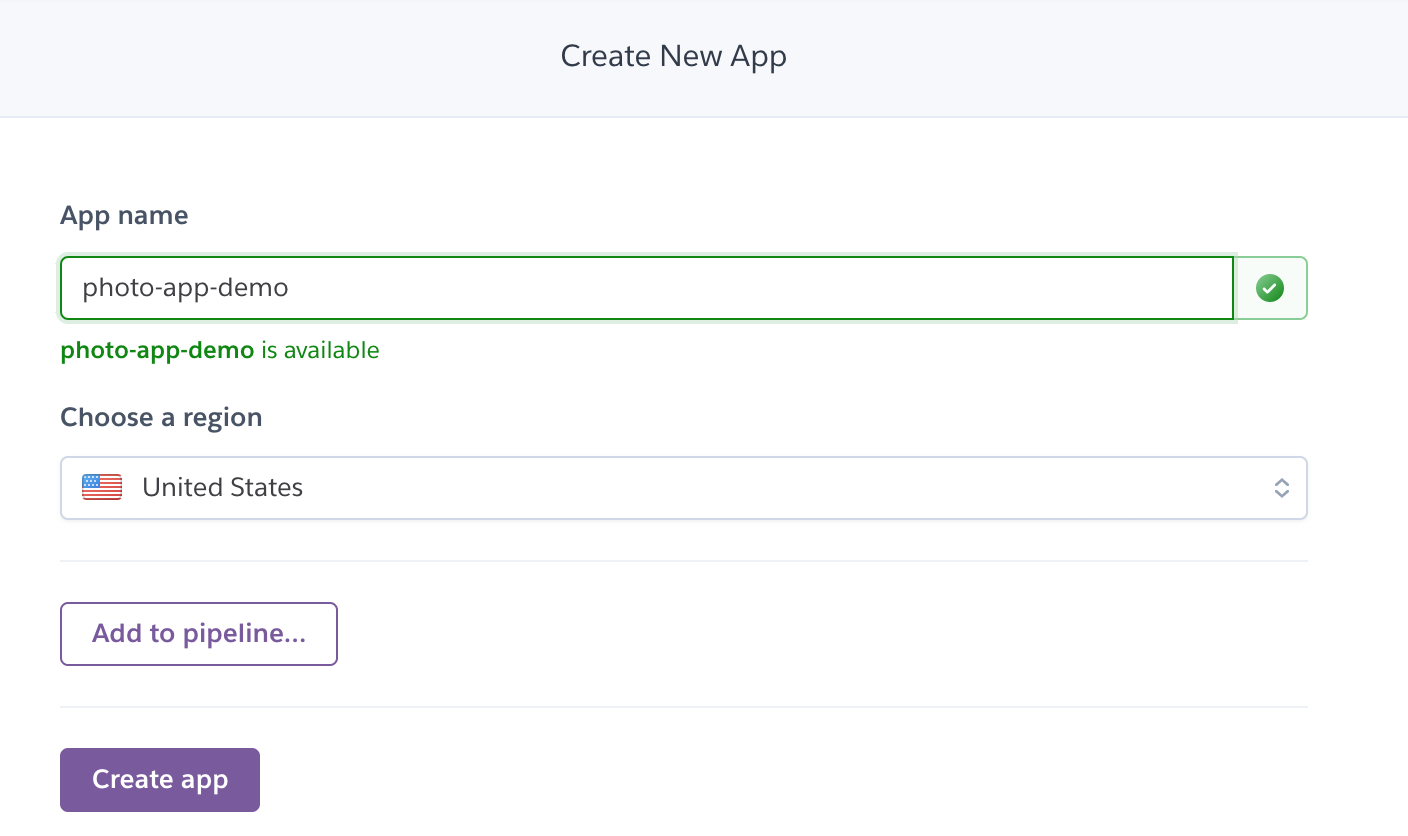
Create a new app on Heroku by logging into the Heroku website and using the Web UI. Name it anything you want!
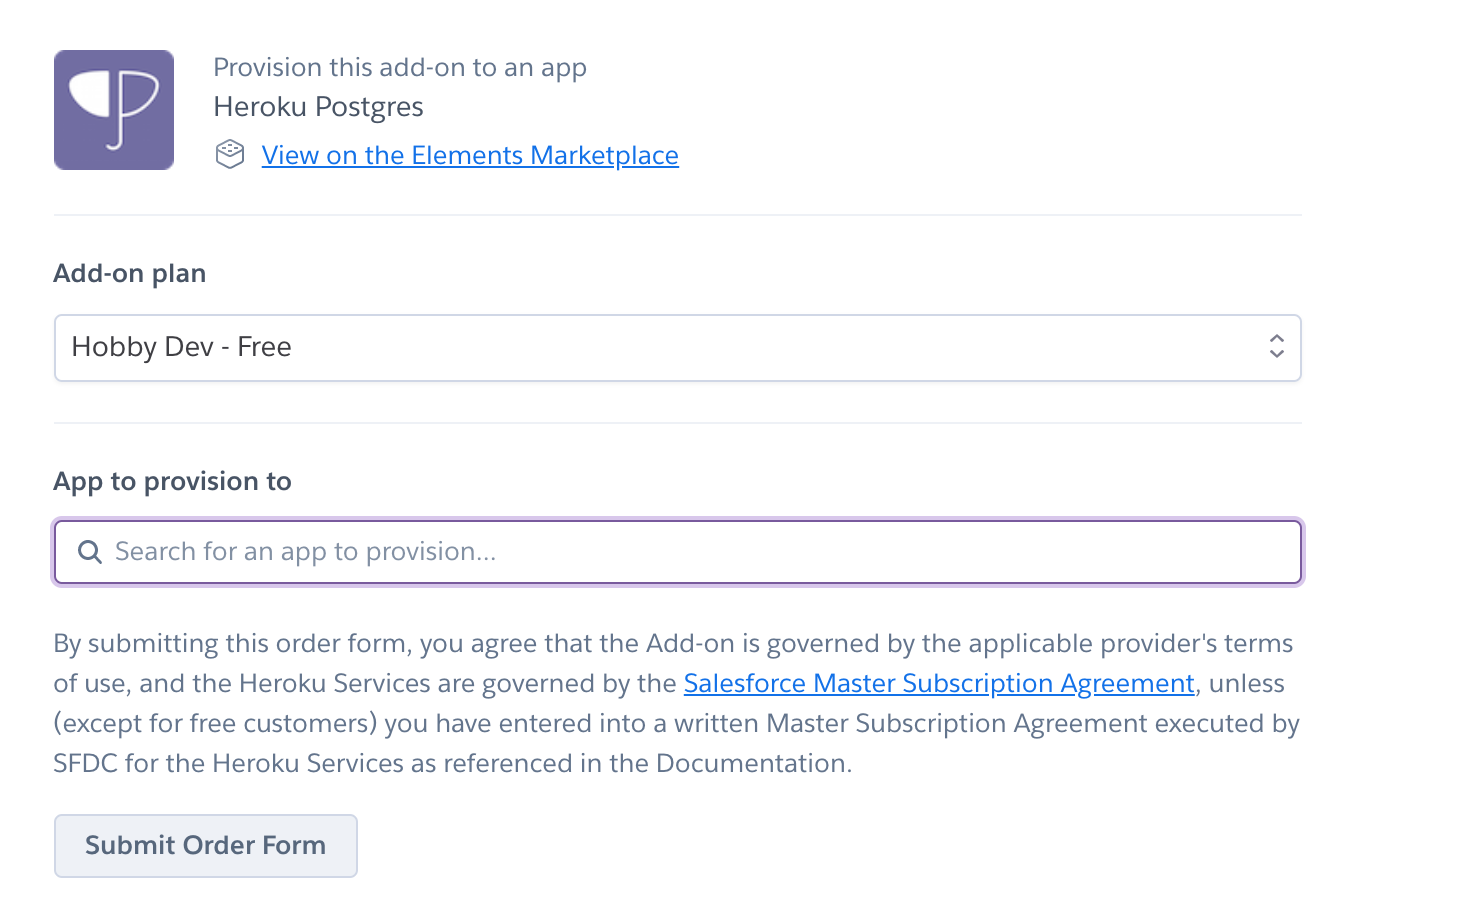
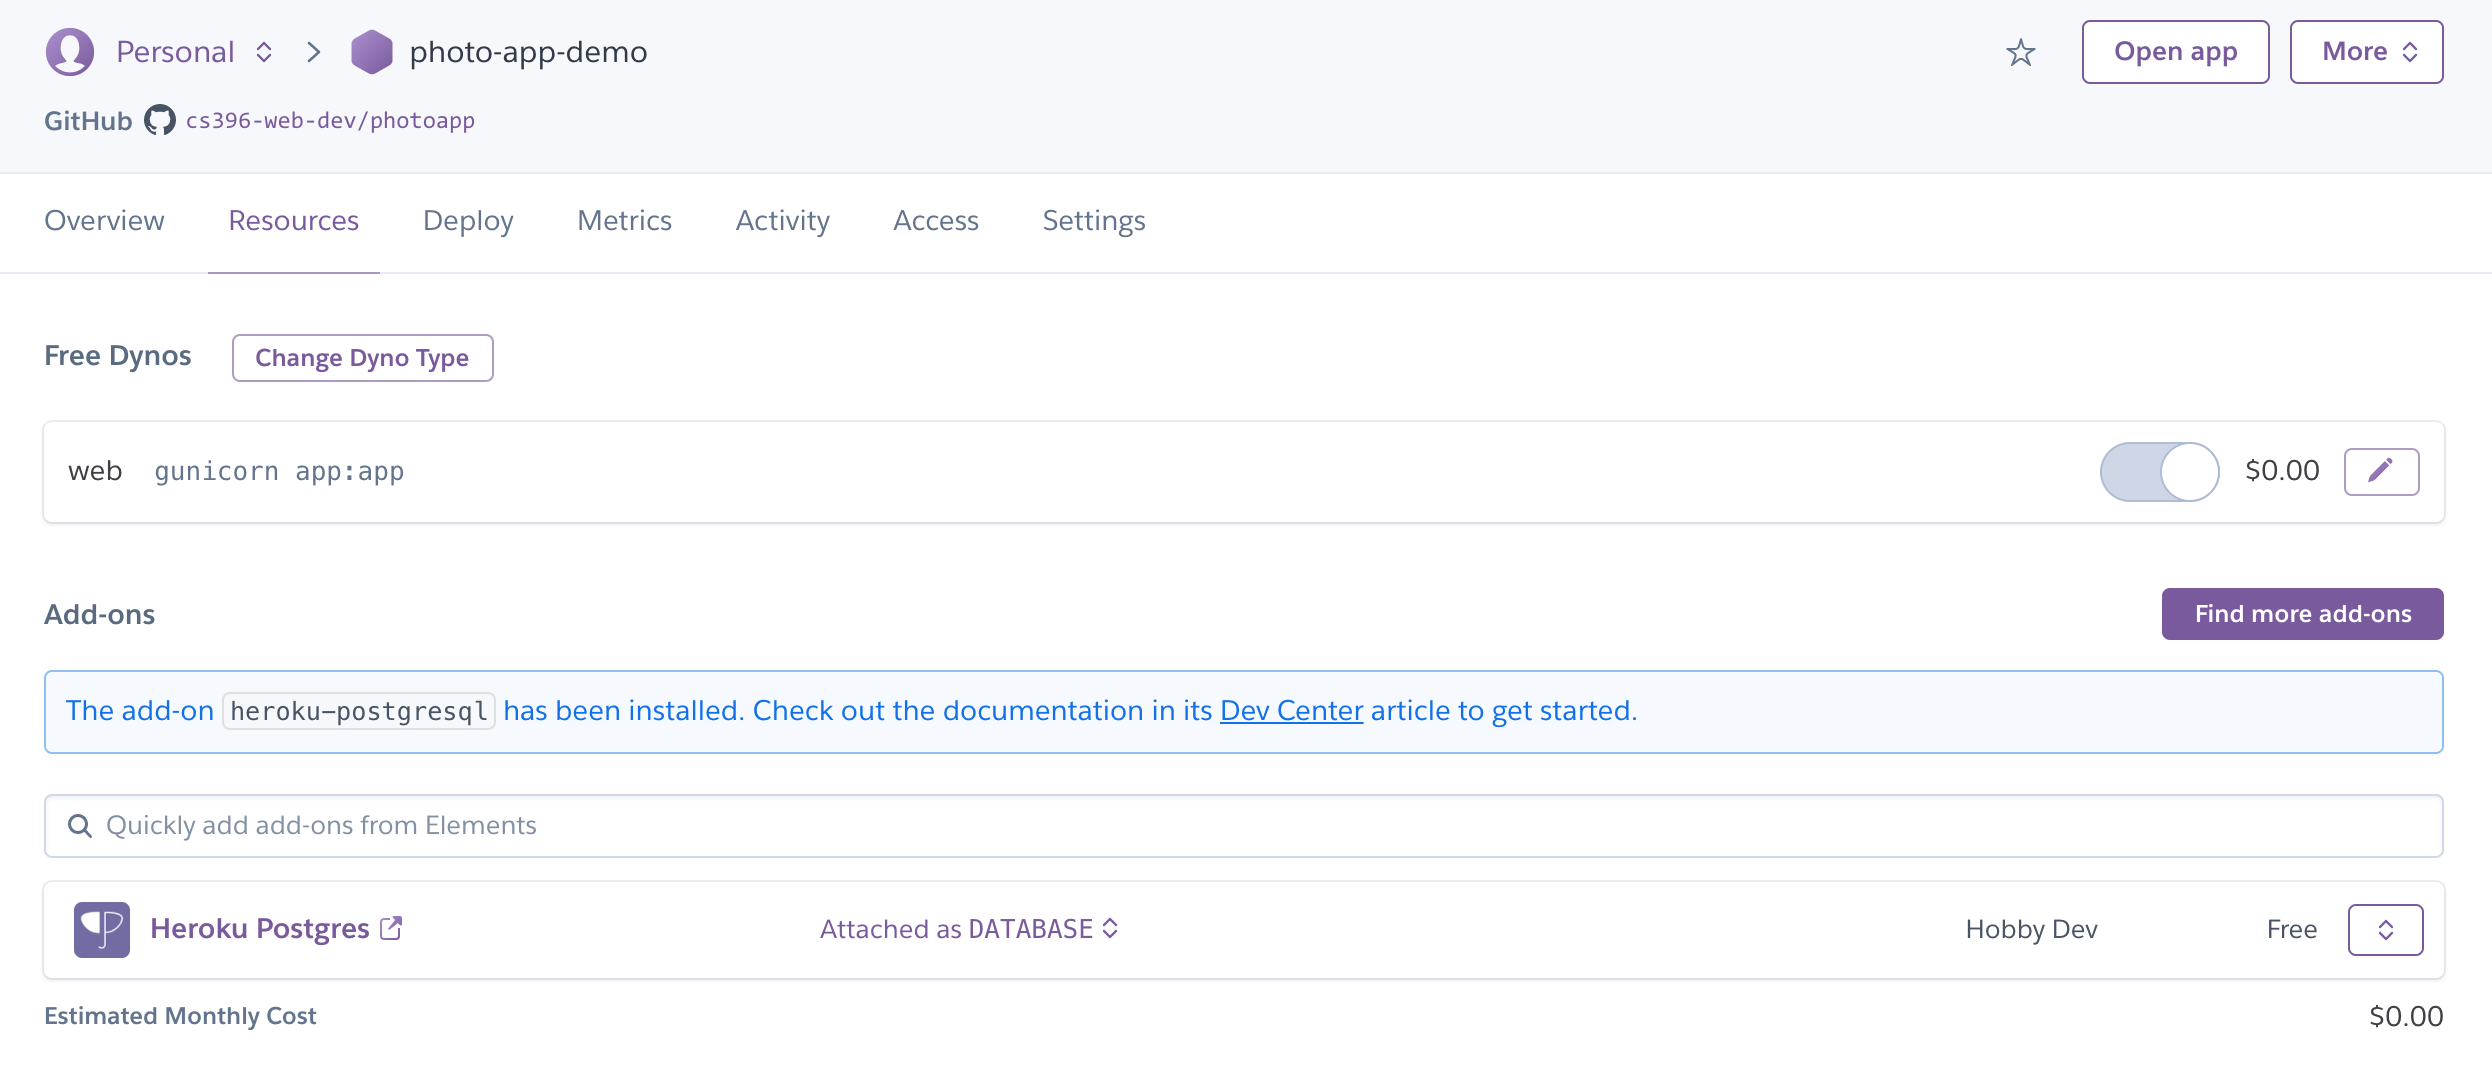
2. Create a Hosted Database
After creating your app, you will create a database using Heroku Postgres. Click the “Install Heroku Postgres” button (purple).
- You will have to register with Heroku as a student to get this database for free.

Next, search for the app you just made and then click “Submit Order Form”
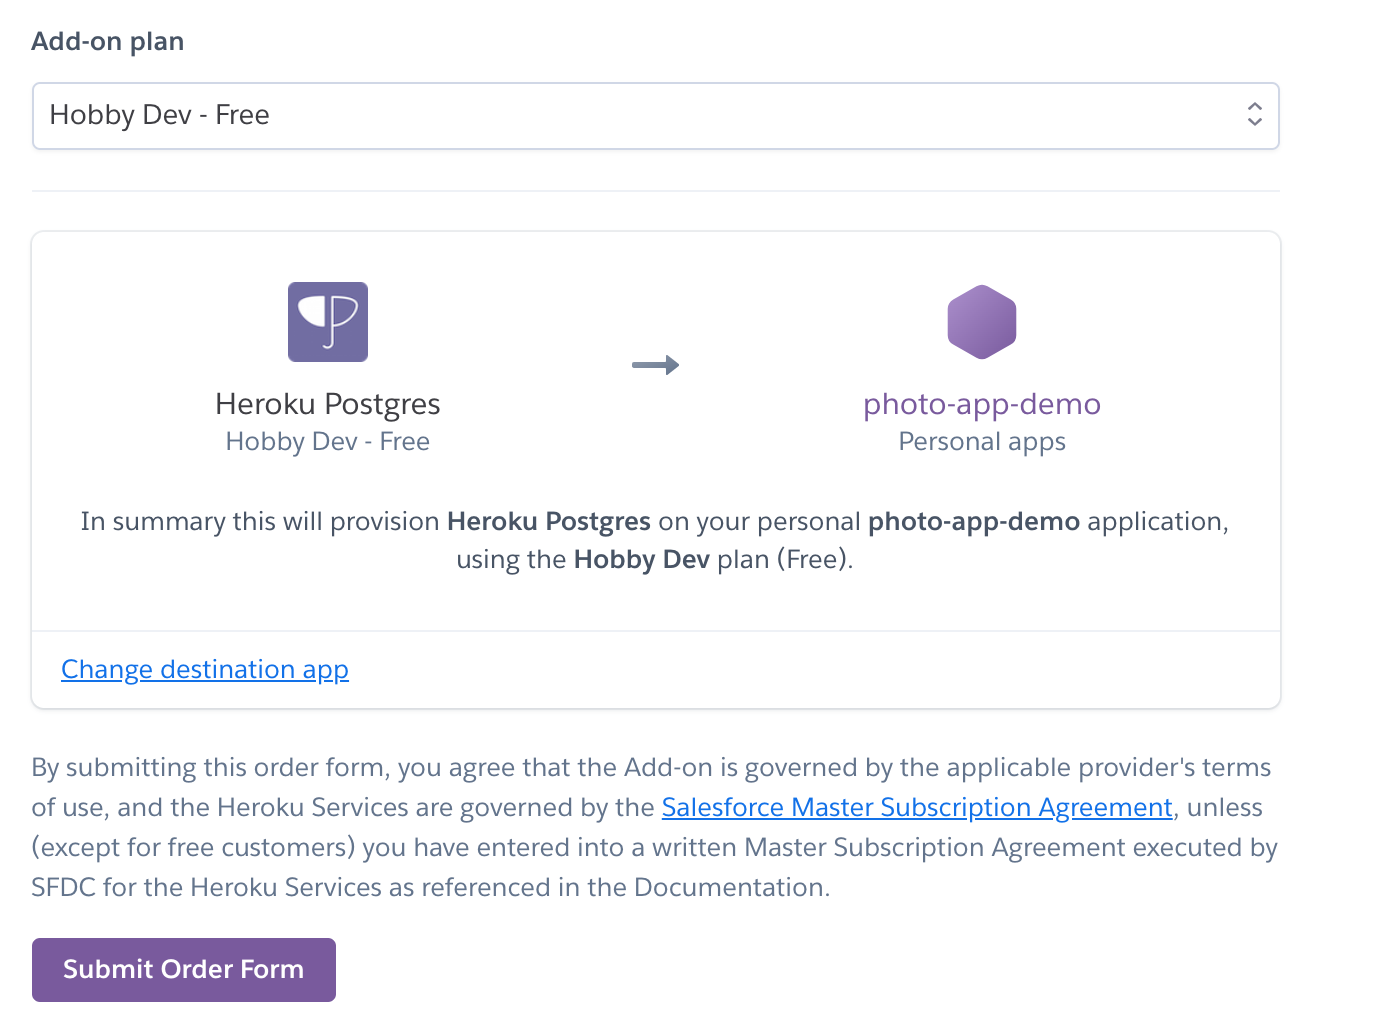
When you’re done, you should see a confirmation screen:
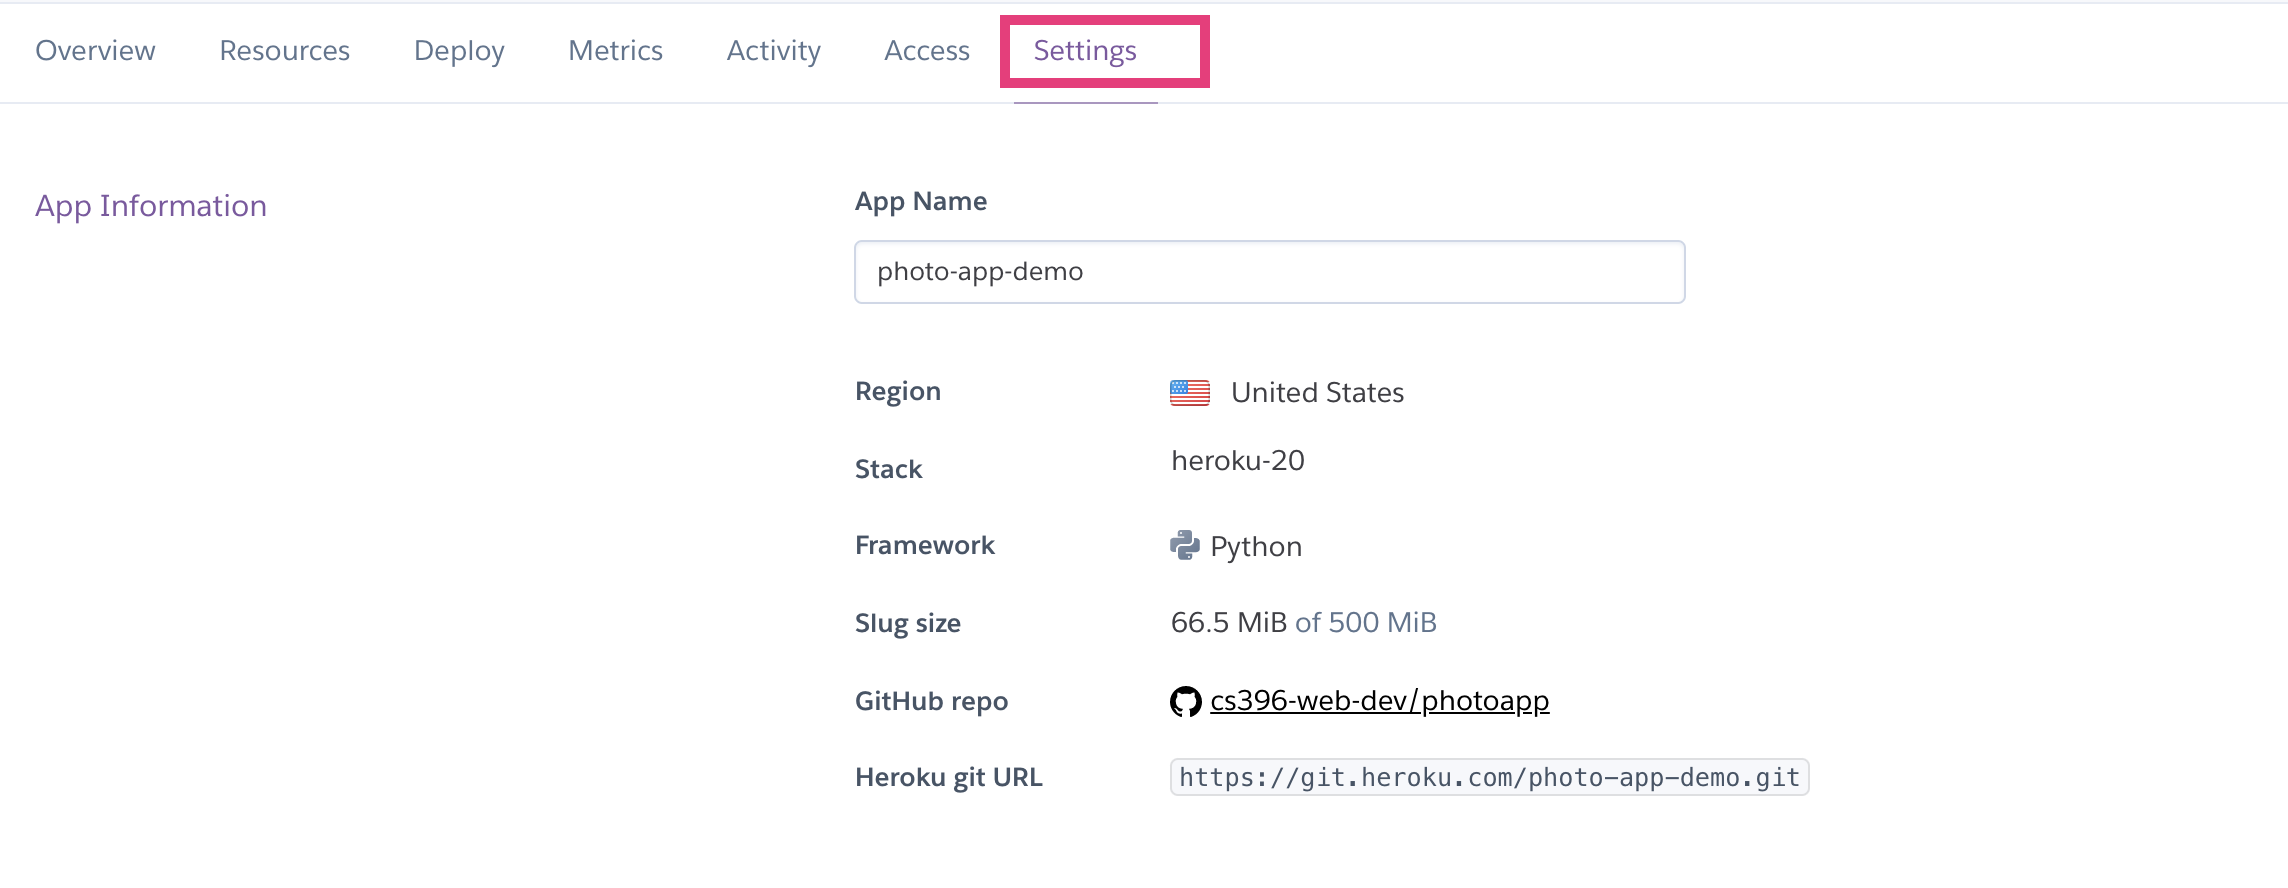
3. Add Environment Variables
Now navigate to the “Settings” tab:
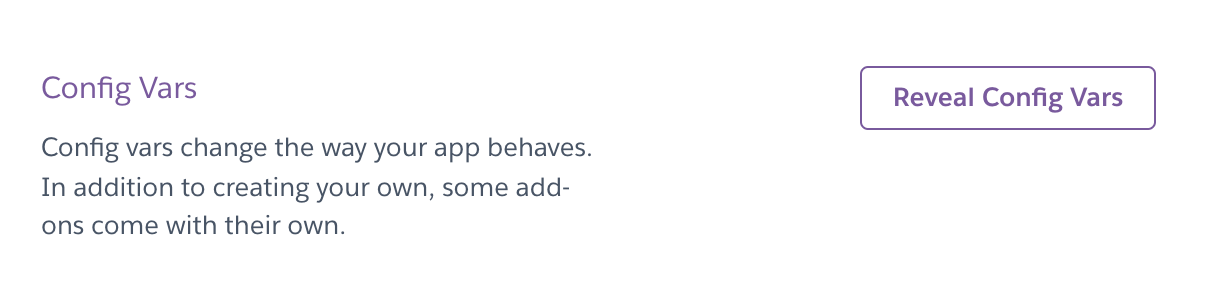
Scroll down and click the “Reveal Config Vars”
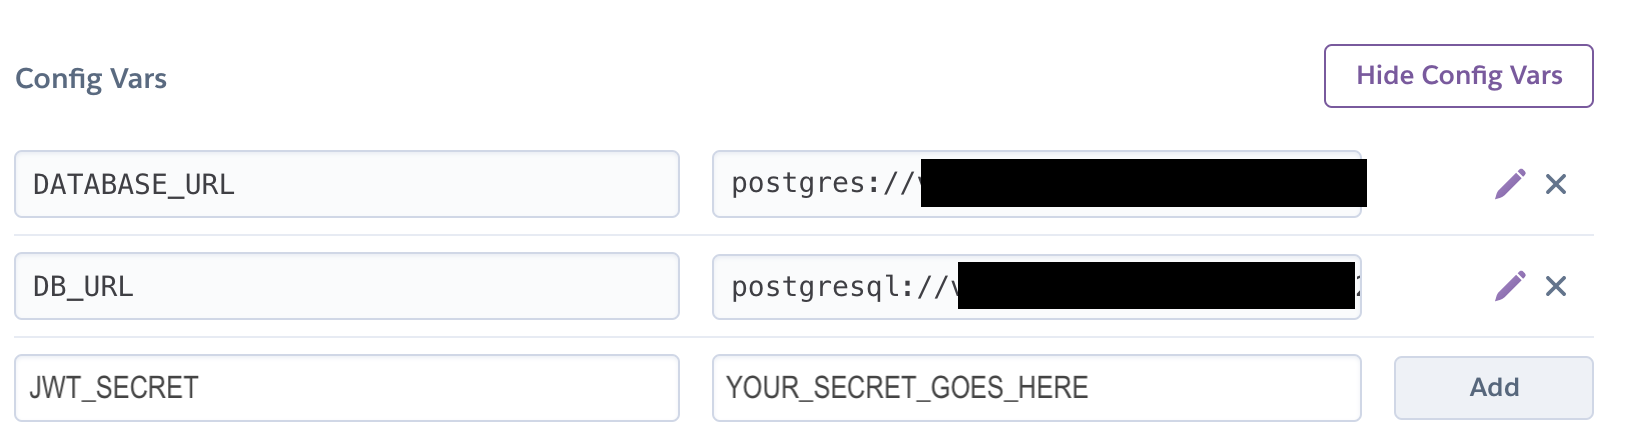
You should notice that Heroku Postgres has created a database connection string for you in the format:
postgres://<username>:<password>@<host>:5432/<database_name>

- You are going to create a new environment variable called
DB_URLthat is identical to theDATABASE_URLstring, but prefixed bypostgresql://instead ofpostgres://(which is necessary to work with SQL Alchemy). - You are also going to create a second environment variable that holds your
JWT_SECRET(see below)
Copy the new DB_URL environment variable into your .env file and comment out the DB_URL environment variable pointing to your local database instance as shown below:
FLASK_APP=app.py

# Comment out local database string:
# DB_URL=postgresql://postgres:12345@localhost/photo-app

# Add cloud database string:
DB_URL=postgresql://some_username:some_password@ec2-34-205-209-14.compute-1.amazonaws.com:5432/some_database

JWT_SECRET=MY_SECRET
Then, on your command line from the root of your photo-app directory, run the populate.py command again:
python populate.py
This will load some fake data into your cloud database. Because you’re inserting ~800 records, this process may take a few minutes.
4. Teach Heroku how to compile your React App
Create a package.json file at the root of your Flask app (note that this is in addition to the package.json file inside of your react-client directory) that has the JSON format shown below. The second package.json file at the root of your app teaches Heroku to compile your react app from within the react-client subdirectory.
{
    "name": "photo-app-heroku-react-build-file",
    "version": "1.0.0",
    "description": "",
    "scripts": {
      "build": "cd react-client && npm install && npm run build"
    },
    "dependencies": {
        "cross-env": "^7.0.3"
    }
}
5. Configure git
- Create a git repository at the root of your web application (if you haven’t already).
- Also create a
.gitignorefile at the root of your repository that excludes your python virtual environment (env), yourreact-client/node_modulesfolder, and yourreact-client/buildfolder.
6. Deploy your app
Finally, you are ready to deploy your app to Heroku via the Heroku Command Line Interface (CLI). Note that the GitHub integration is broken.
- Download and install the Heroku CLI for your OS.
- Navigate to your
photo-appfolder (or whatever you called it) using the command line. - Log into your Heroku account using the command line interface (CLI), where you will be prompted for a password:
heroku login - Connect your local git repo to your newly created Heroku app (you will only have to do this once):
heroku git:remote -a name-of-the-app-you-just-made - Push your repo to Heroku:
git push heroku main.- Read more on StackOverflow.
- Test your web server.
- Don’t forget to also push your repo to GitHub
git push origin main(after you’ve configured it).