Activity: Configuring Git and GitHub
Overview
The goal of this activity is to help you publish your web page to GitHub. To do this:
1. Background Readings
Please complete the following readings / video tutorials:
- Intro to git and GitHub. A little technical, but please do your best to read it and come to tutorial with questions.
- Using GitHub with Visual Studio Code. How we will be using GitHub in this class.
2. Install Git
In order to interact with GitHub, you need to install git. Before you install it, check and make sure it’s not already installed by:
- Windows: search for the software program “GitBash.” If you find it, git is already installed.
- Mac:
- Opening your Terminal and type the word
gitat the command prompt. - If you get a message that says “not recognized” or something along those lines, then you need to install it.
- Opening your Terminal and type the word
If you need to install it, follow these instructions: https://git-scm.com/book/en/v2/Getting-Started-Installing-Git.
3. Register for an account on GitHub
If you don’t already have a GitHub account, register for one: https://github.com/join. Some notes:
- Please have your password close at hand. Particularly if you are using the computer lab computers, you will keep being prompted for your password.
- Mac users may also need to create a “Personal Access Token”. The process is described here.
Register for GitHub Student Developer Pack
- Please follow these instructions to register for the GitHub Student Developer Pack.
4. Configure the Git / Visual Studio Code Plugin
1. Tell the system who you are
Tell your computer who you are on Git by running the following commands in GitBash (Windows) or in the Terminal (Mac):
git config --global user.name "Sarah"
git config --global user.email "my_email@gmail.com"
Please use your name, and the email you used when registering with GitHub.
Note for Computer Lab Computers
If you are using a computer lab computer, you will need to complete this step each time you use git.
2. Verify your file structure
Please ensure that your csci344 folder looks like this:
csci334
├── lectures
│   └── lecture03
│   │    └── index.html
│   └── lecture04
│       ├── README.md
│       └── my_website
│           ├── files
│           │   └── gallery.html
│           ├── home
│           │   ├── contact.html
│           │   ├── index.html
│           │   └── styles
│           │       ├── dark
│           │       │   └── new.css
│           │       └── my_style.css
│           ├── images
│           │   ├── cat.jpg
│           │   └── dog.jpg
│           └── test.html
└── tutorials
It’s OK if your tutorials folder isn’t set up yet, but make sure your lectures folder looks like the one shown above. This is very important.
3. Initialize a Git Repository
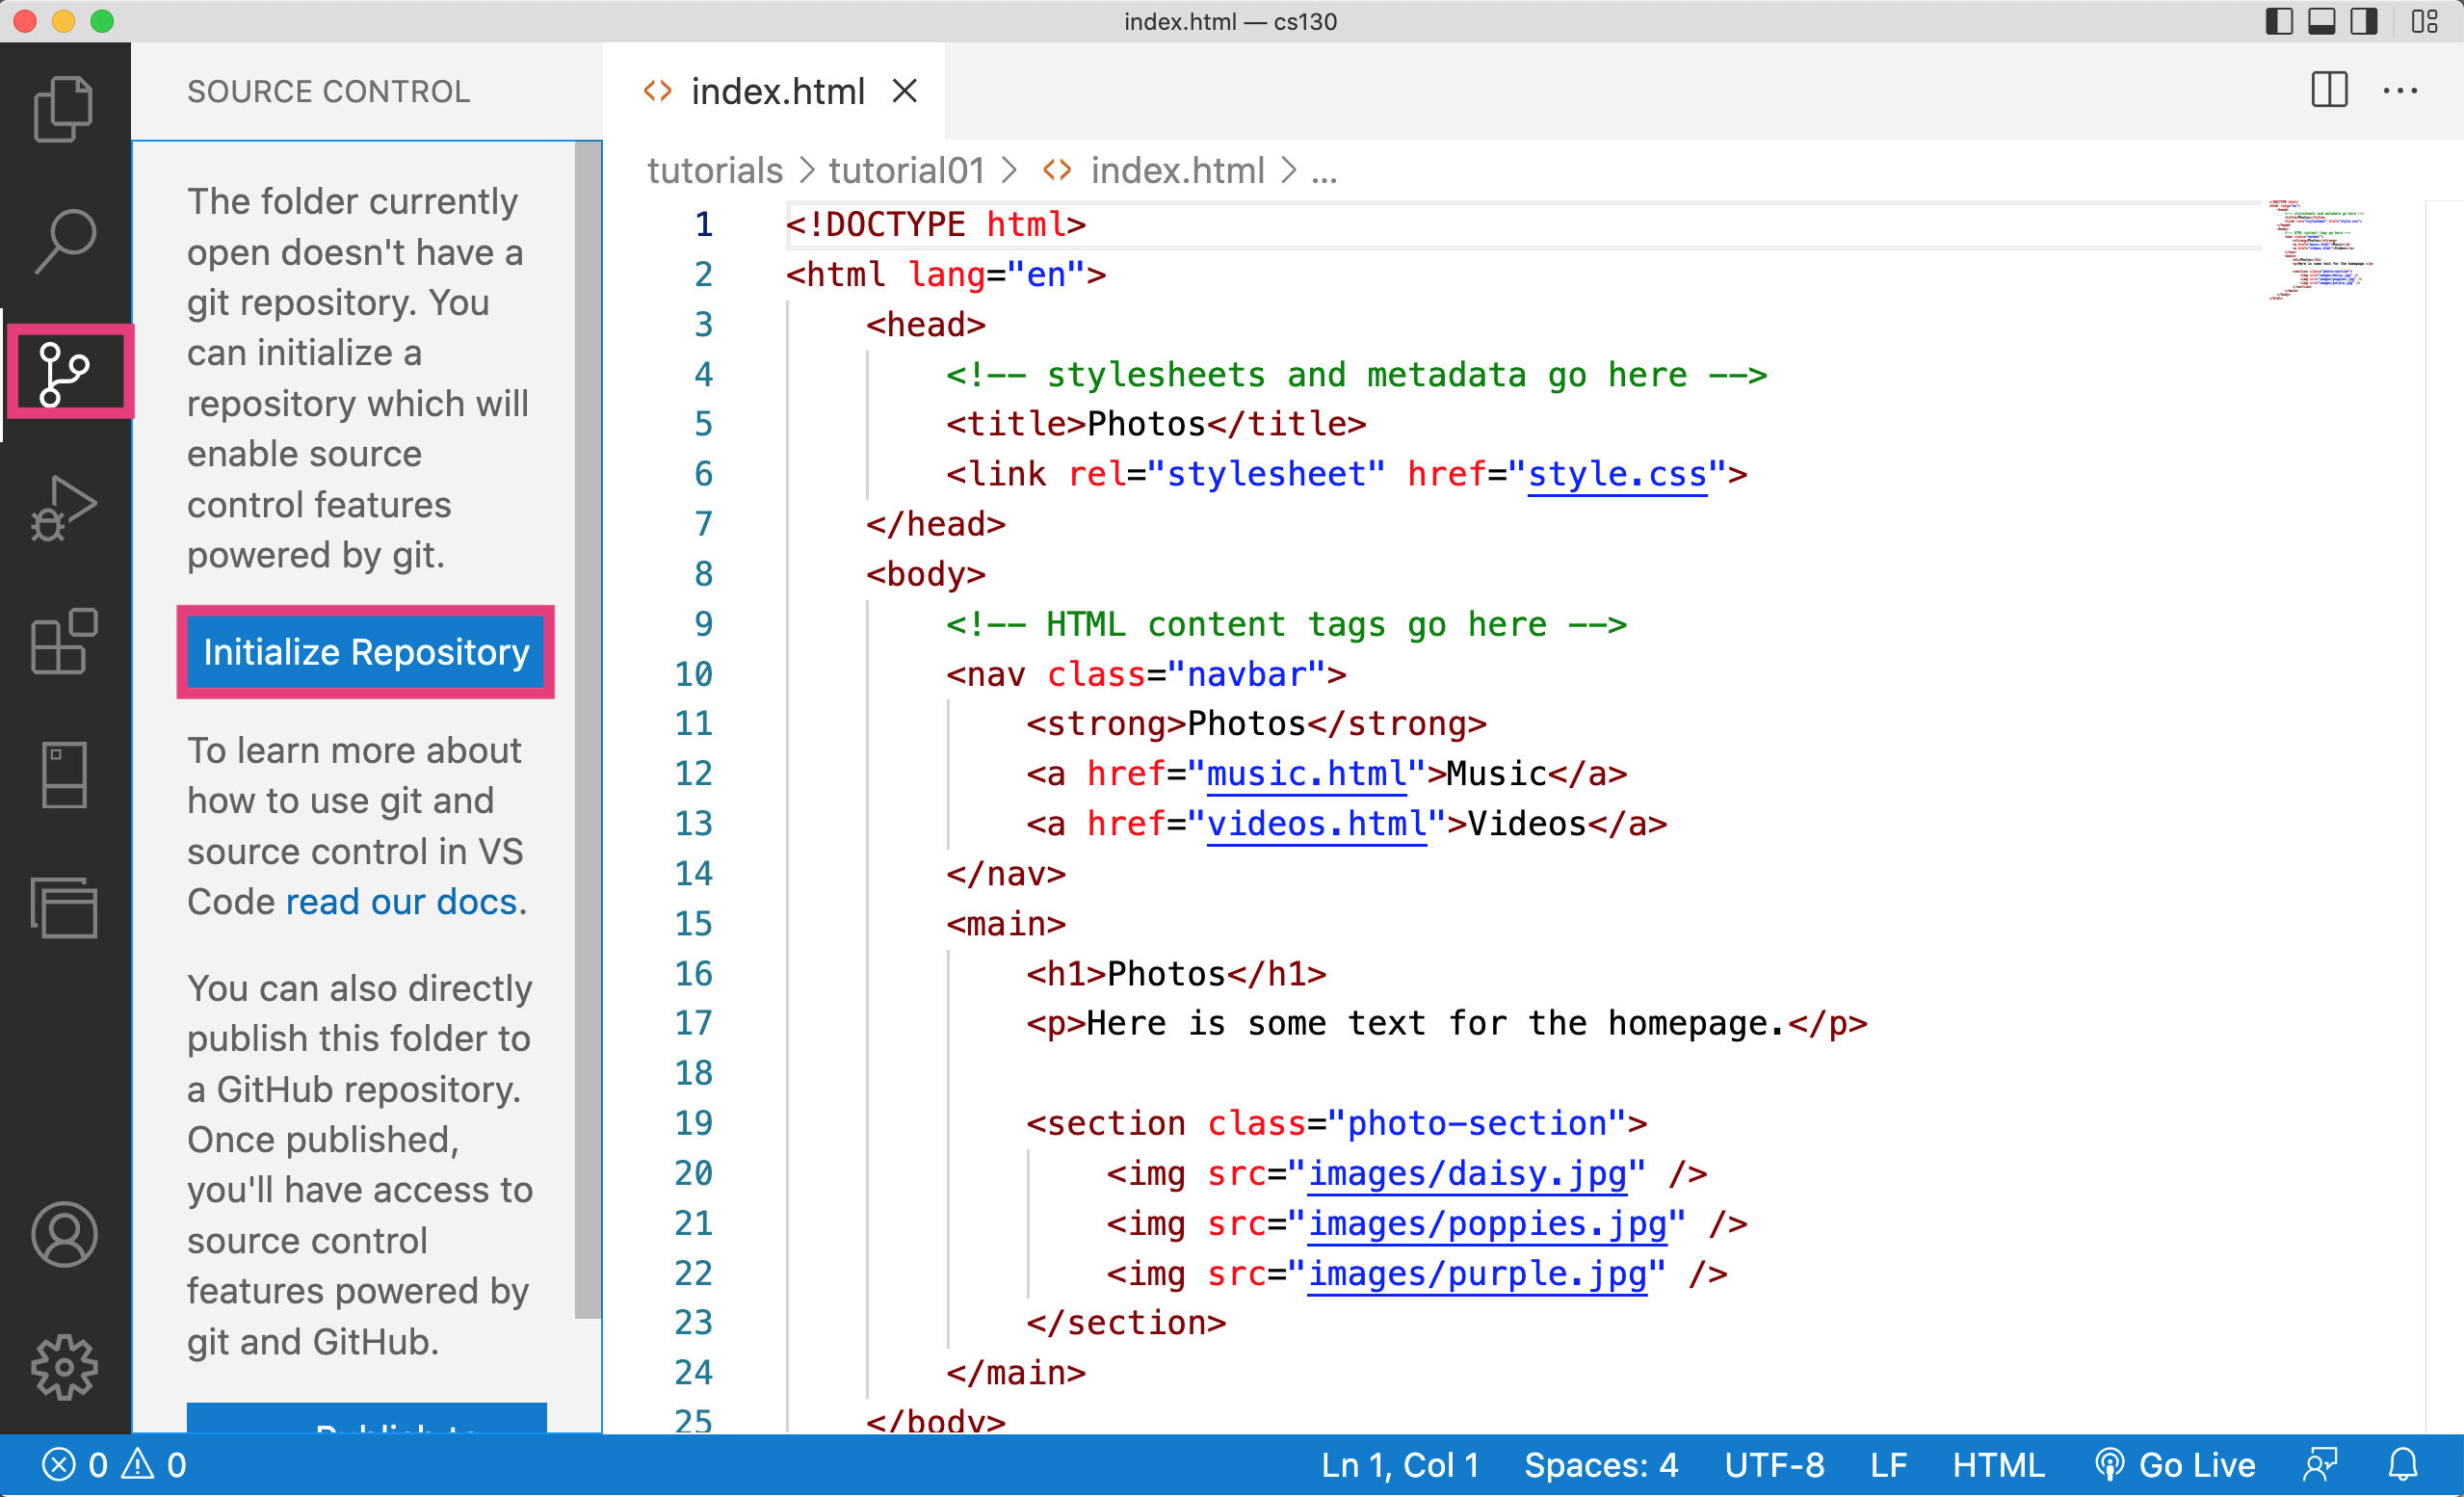
After you’ve doublechecked your file structure, open your entire csci344 folder in VS Code. Next, click on the icon that looks like a tree branch, and click the blue button that says “Initialize Repository”:
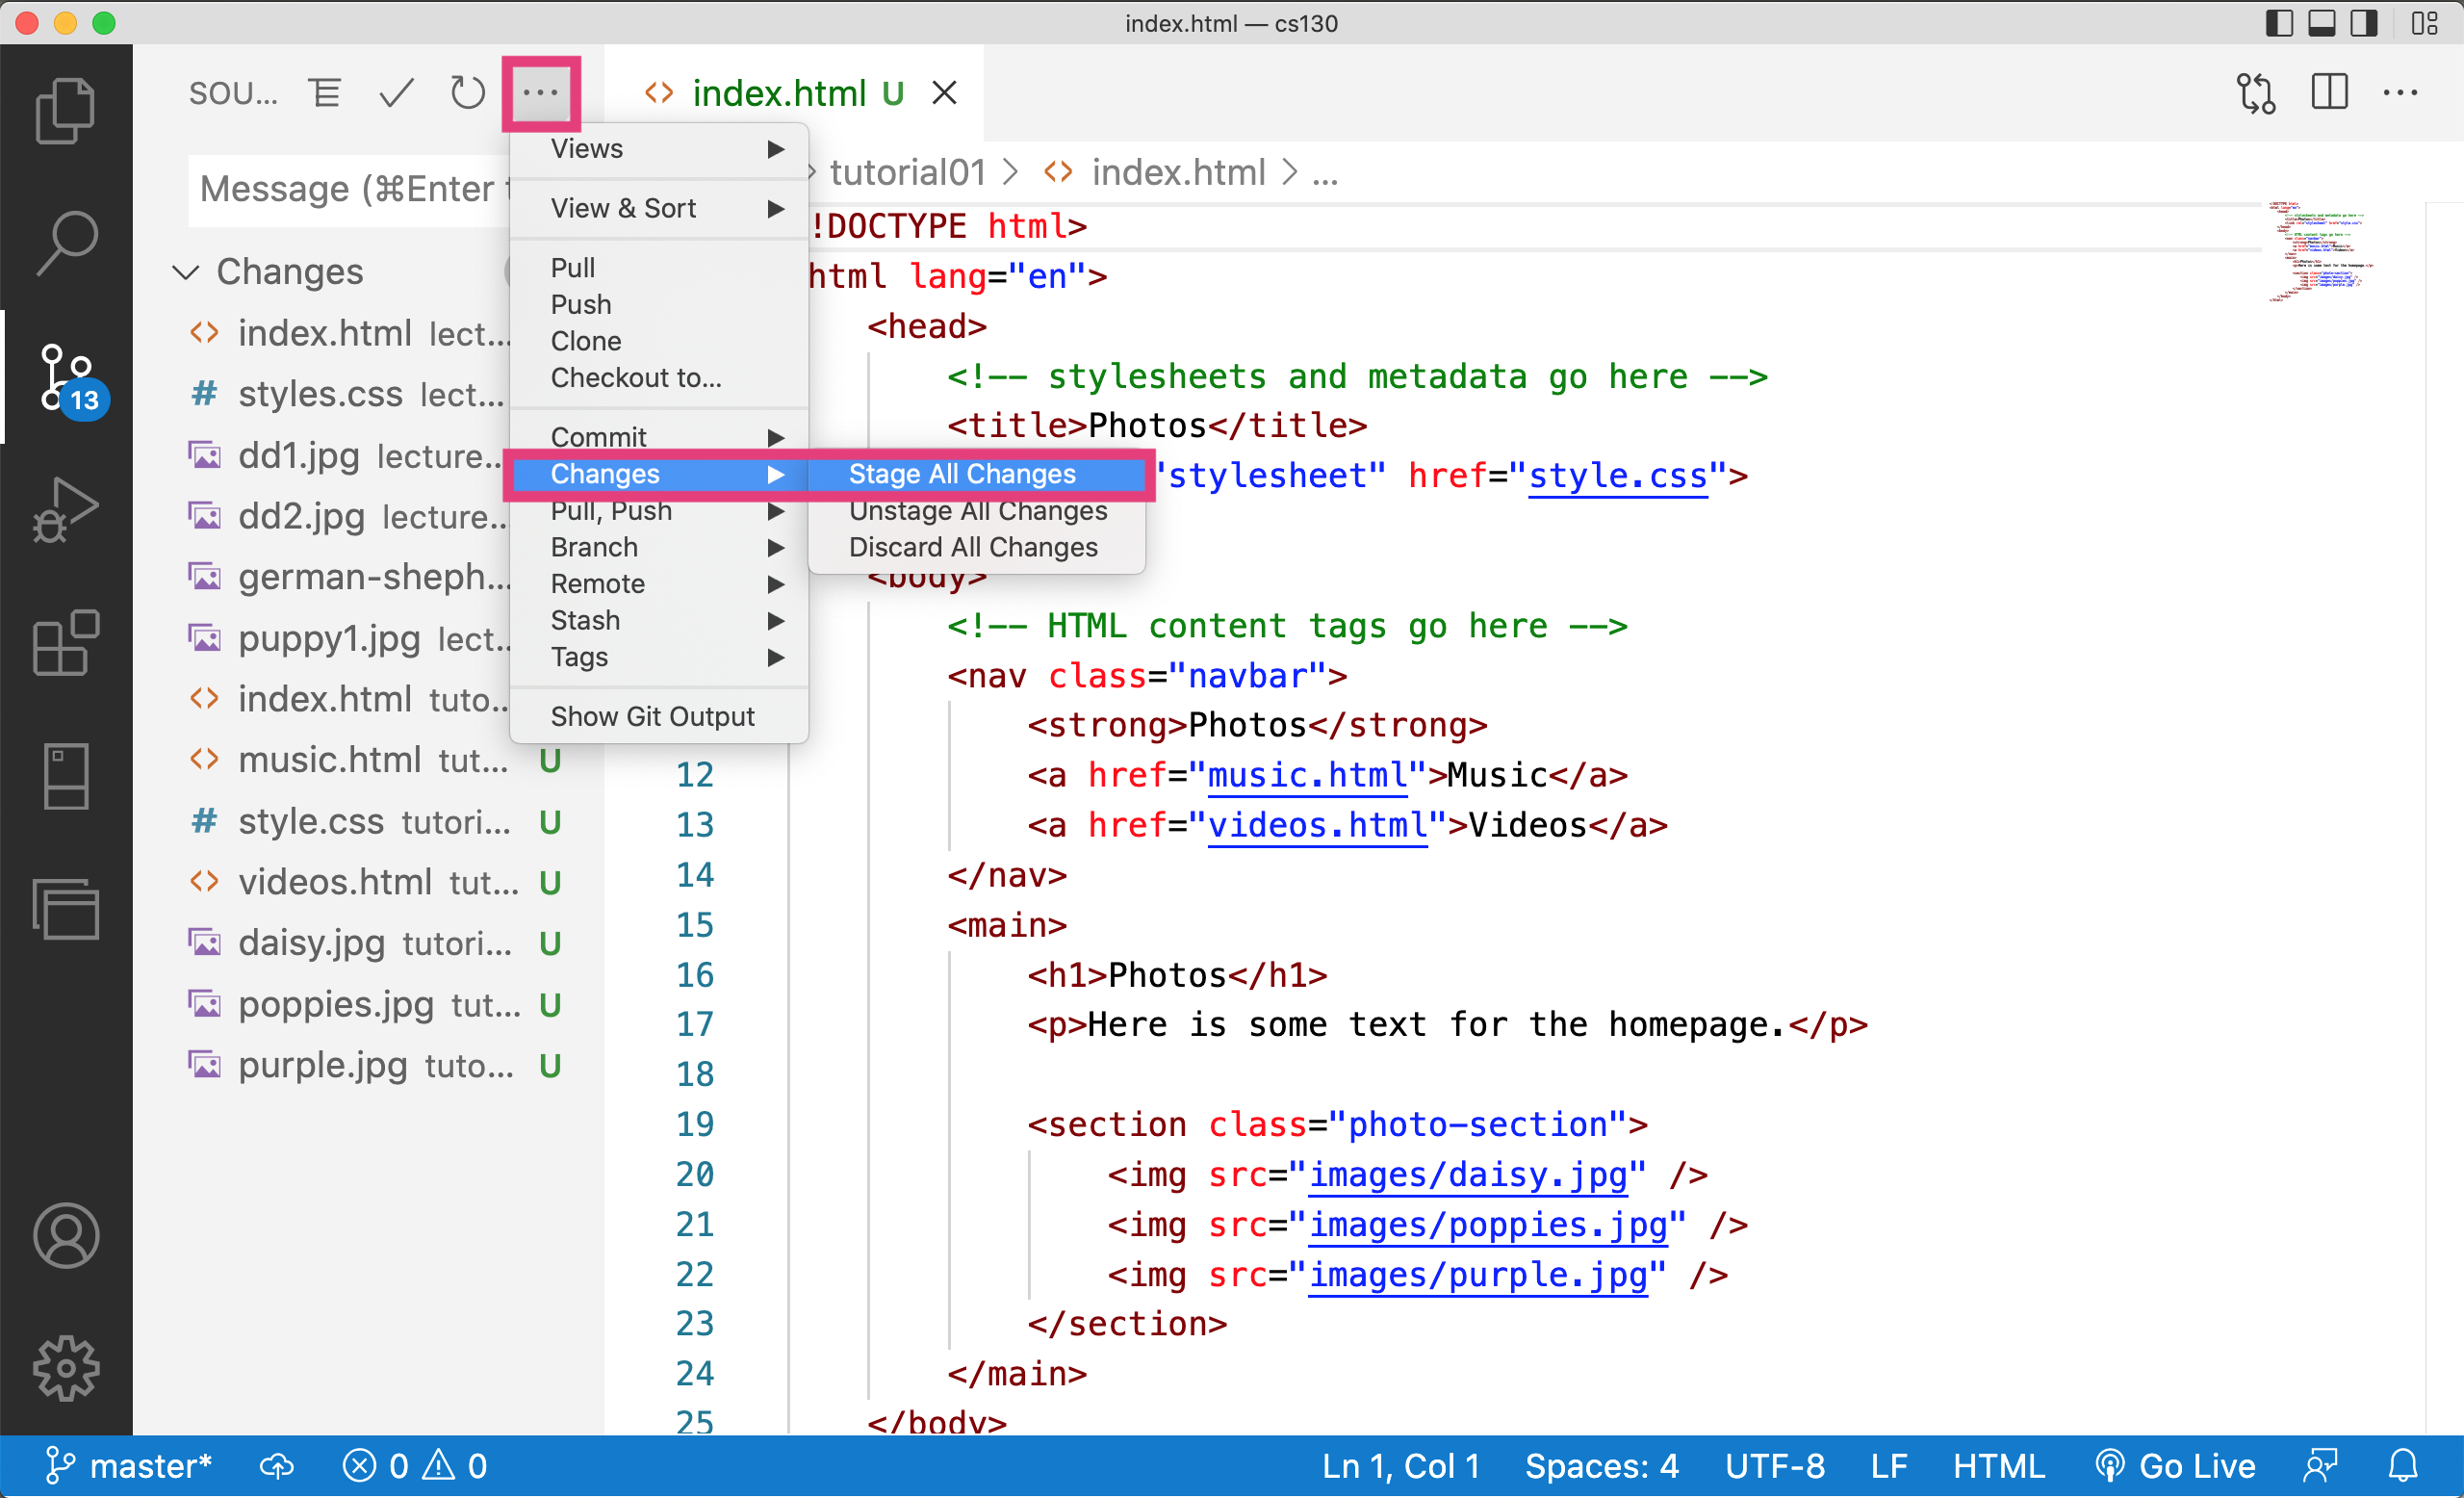
You have now created a git repository on your computer in the same folder as your csci344 folder. Now, you will want to “stage” all of your changes. Click the button with the three dots, then select “Changes”, and then “Stage All changes”:
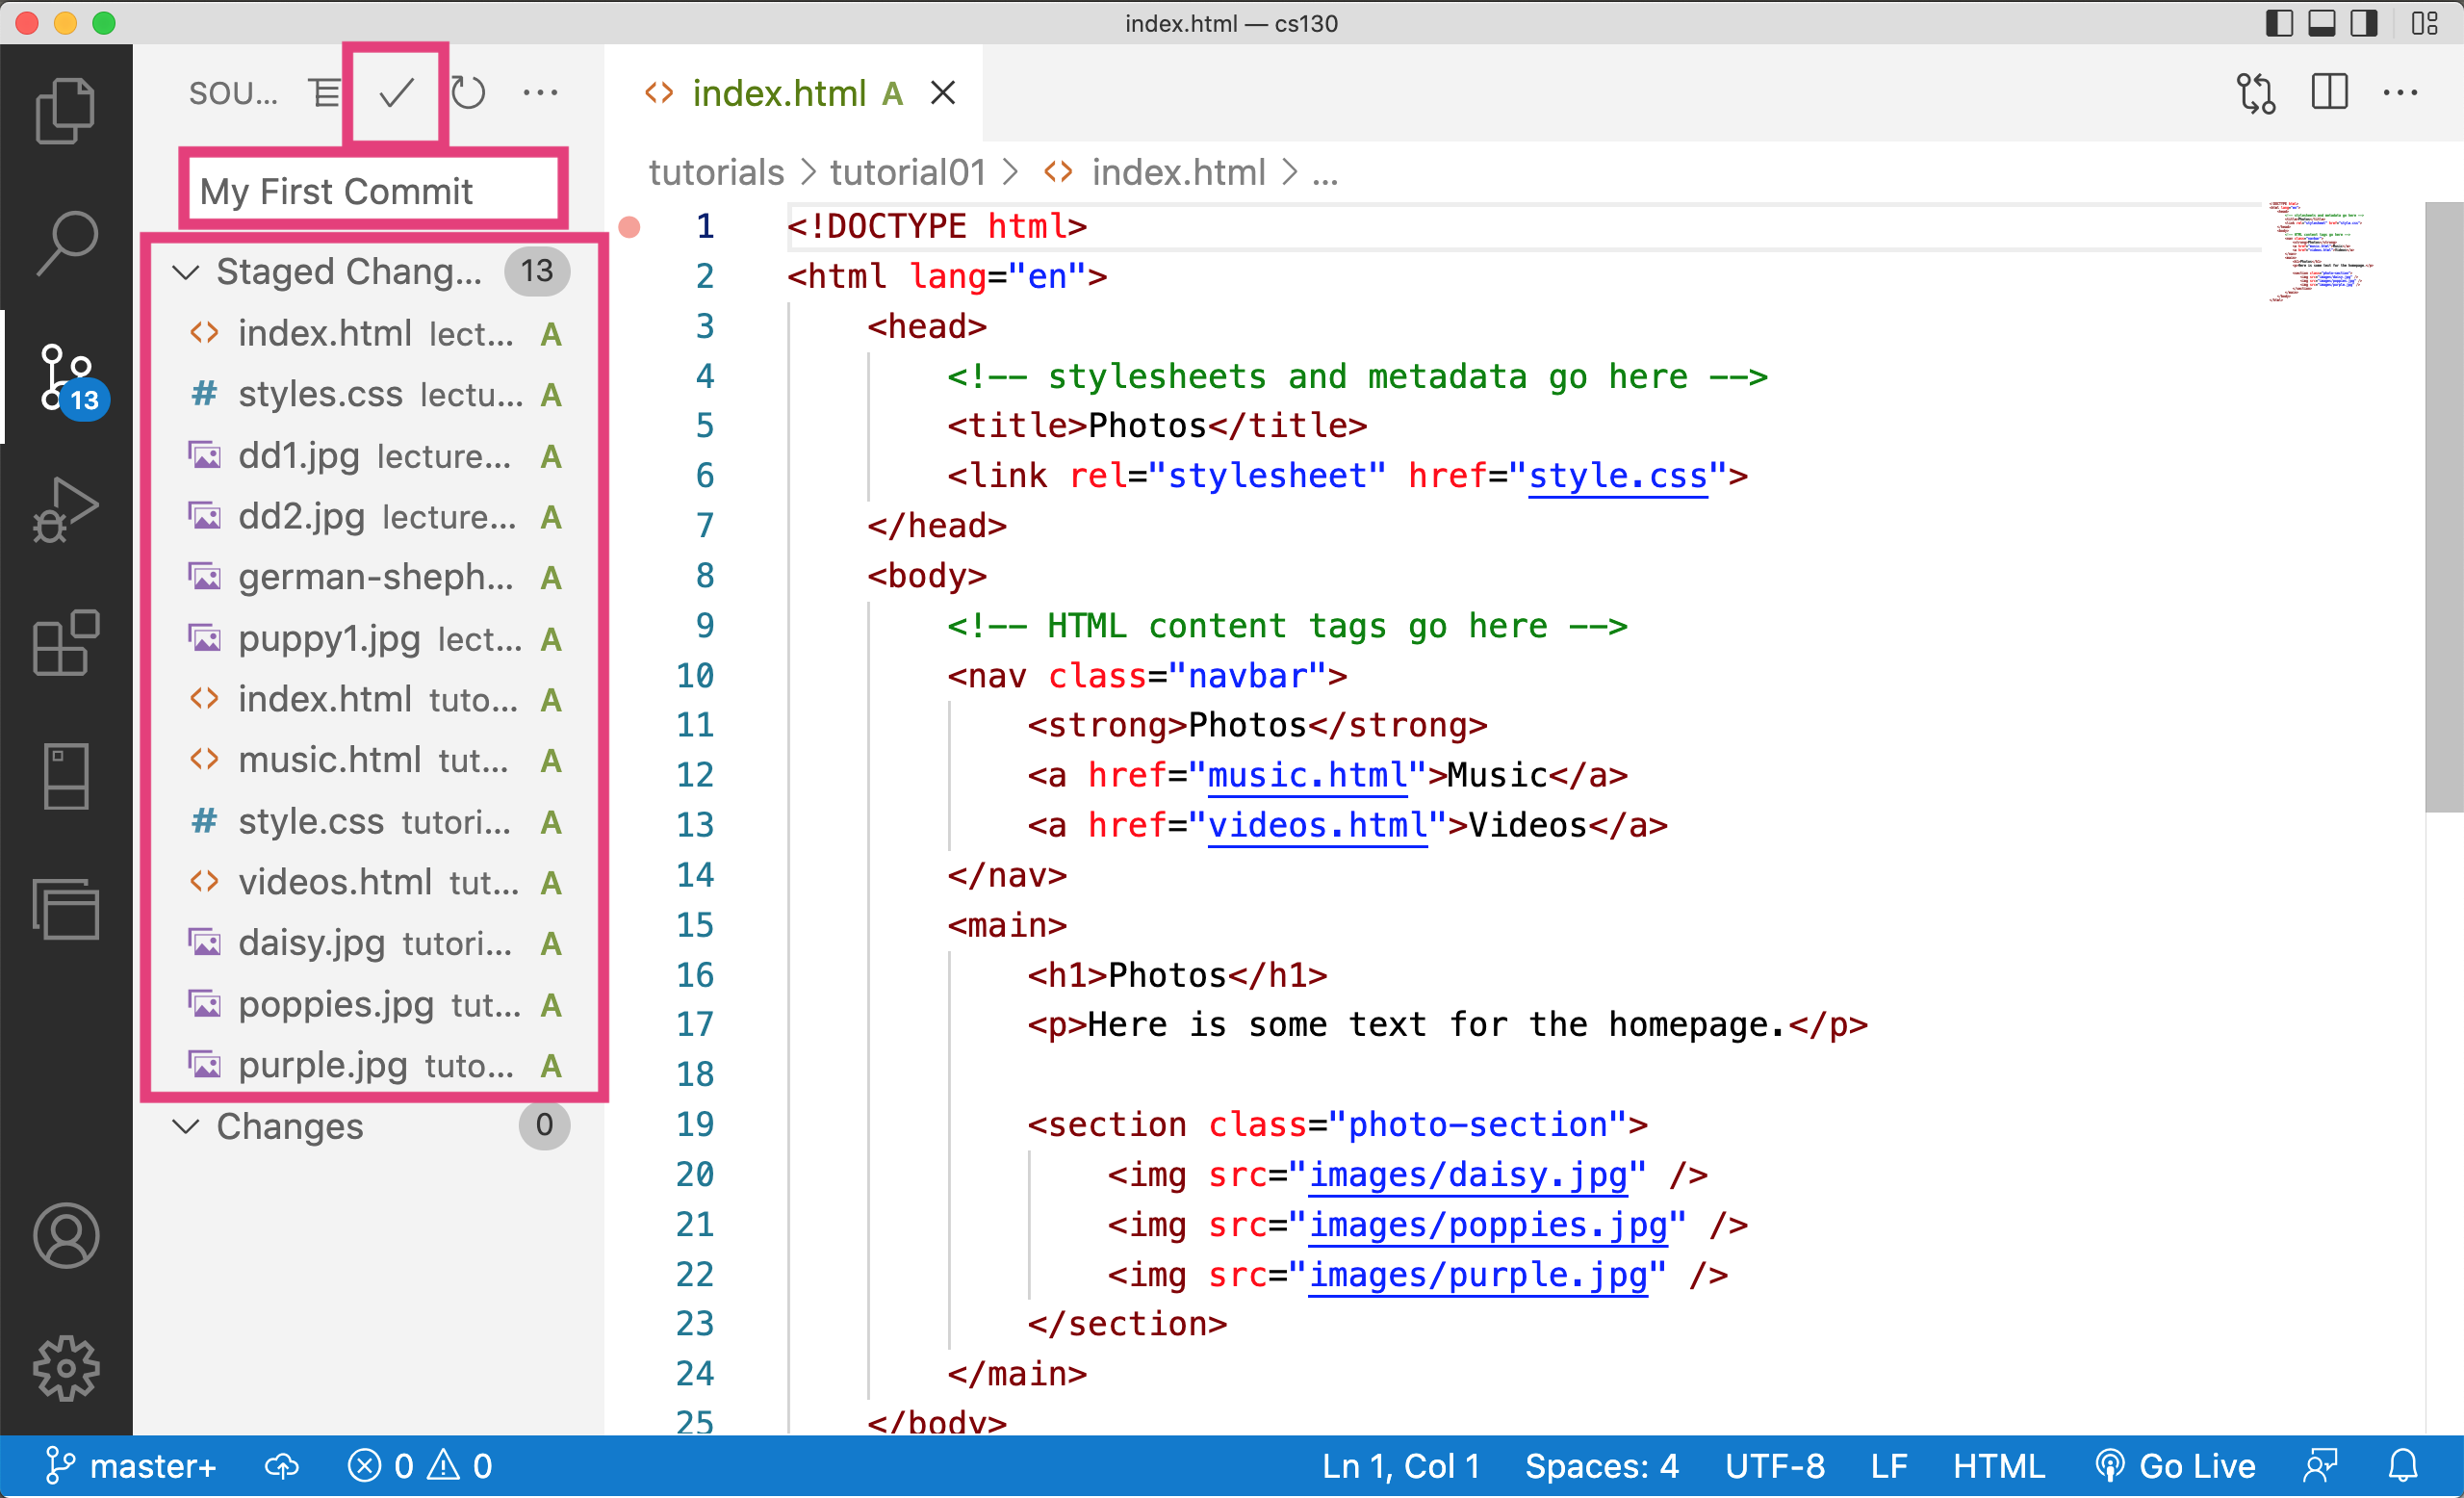
After you “stage” your changes, you will note that the left-hand panel has changed. Specifically:
- The panel lists all of the files that are “staged” to be committed, with an “A” next to each file (indicating that you are adding the files for the first time).
- To commit these changes, type a message in the text box that says “My First Commit” and then click the check button to actually issue the commit:
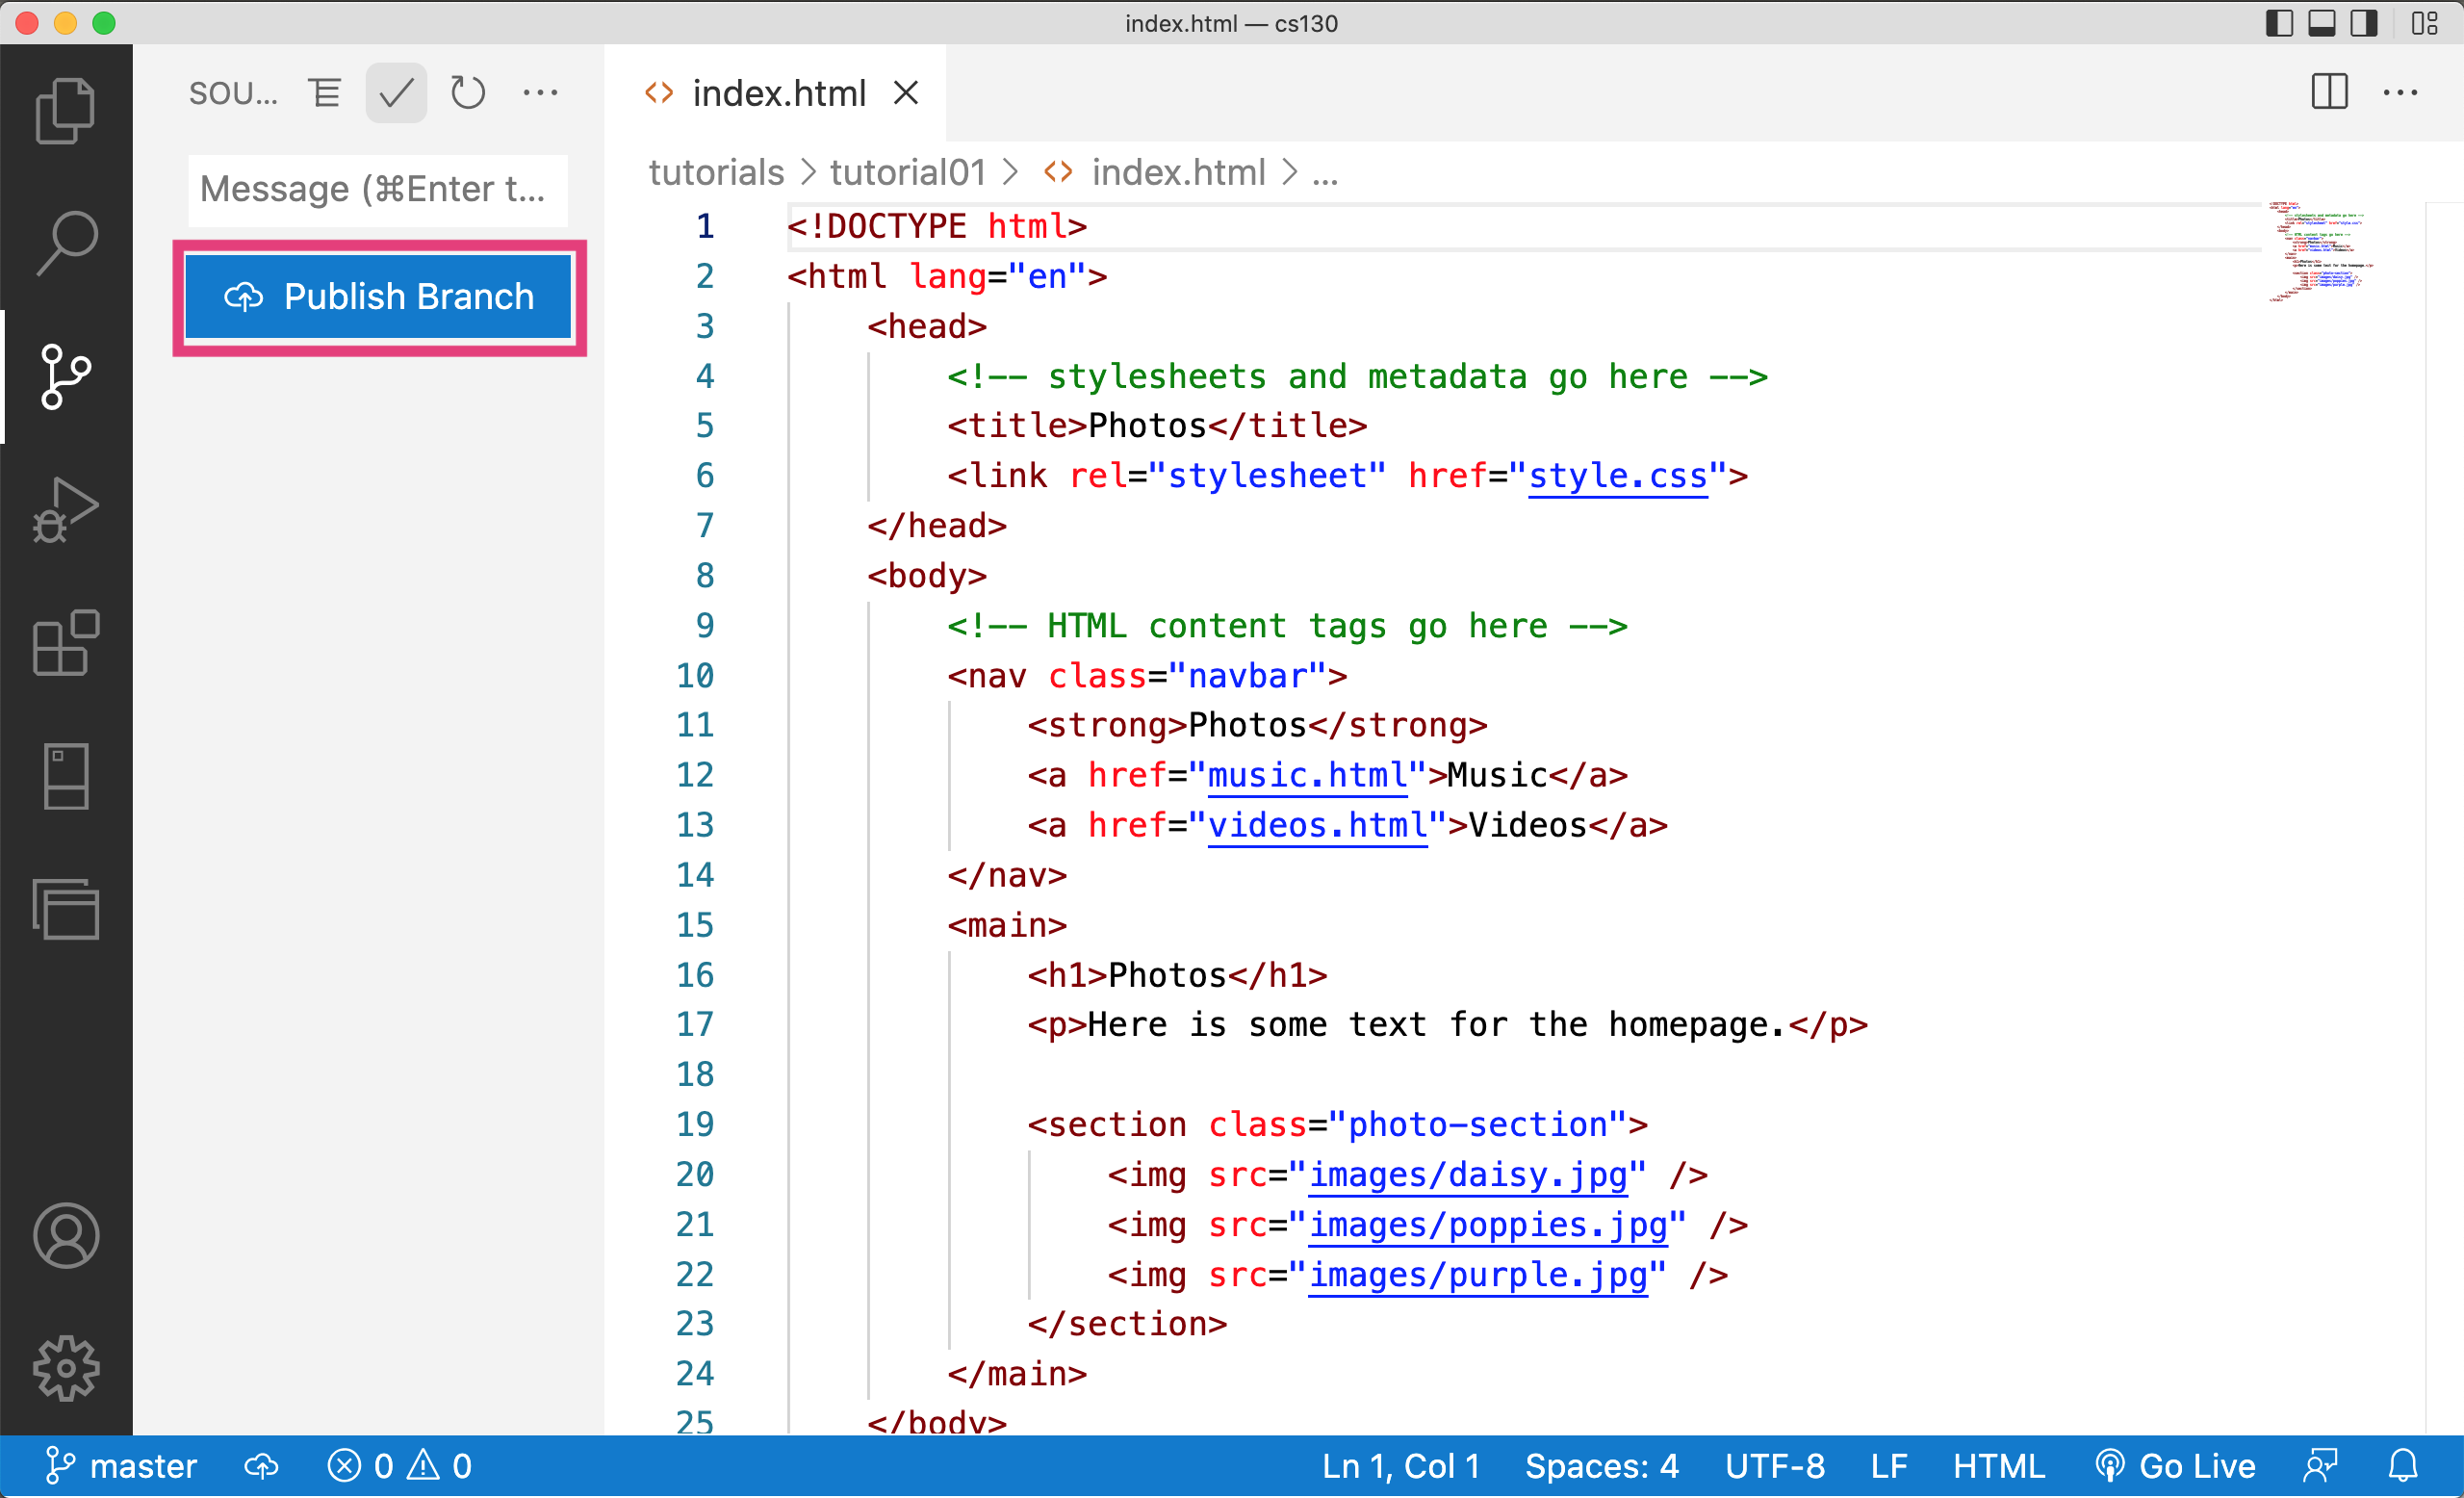
Afterwards, a button will appear that says “Publish Branch.” Click this button. It may prompt you to install a GitHub plugin. Please agree that you are OK to install the GitHub plugin.
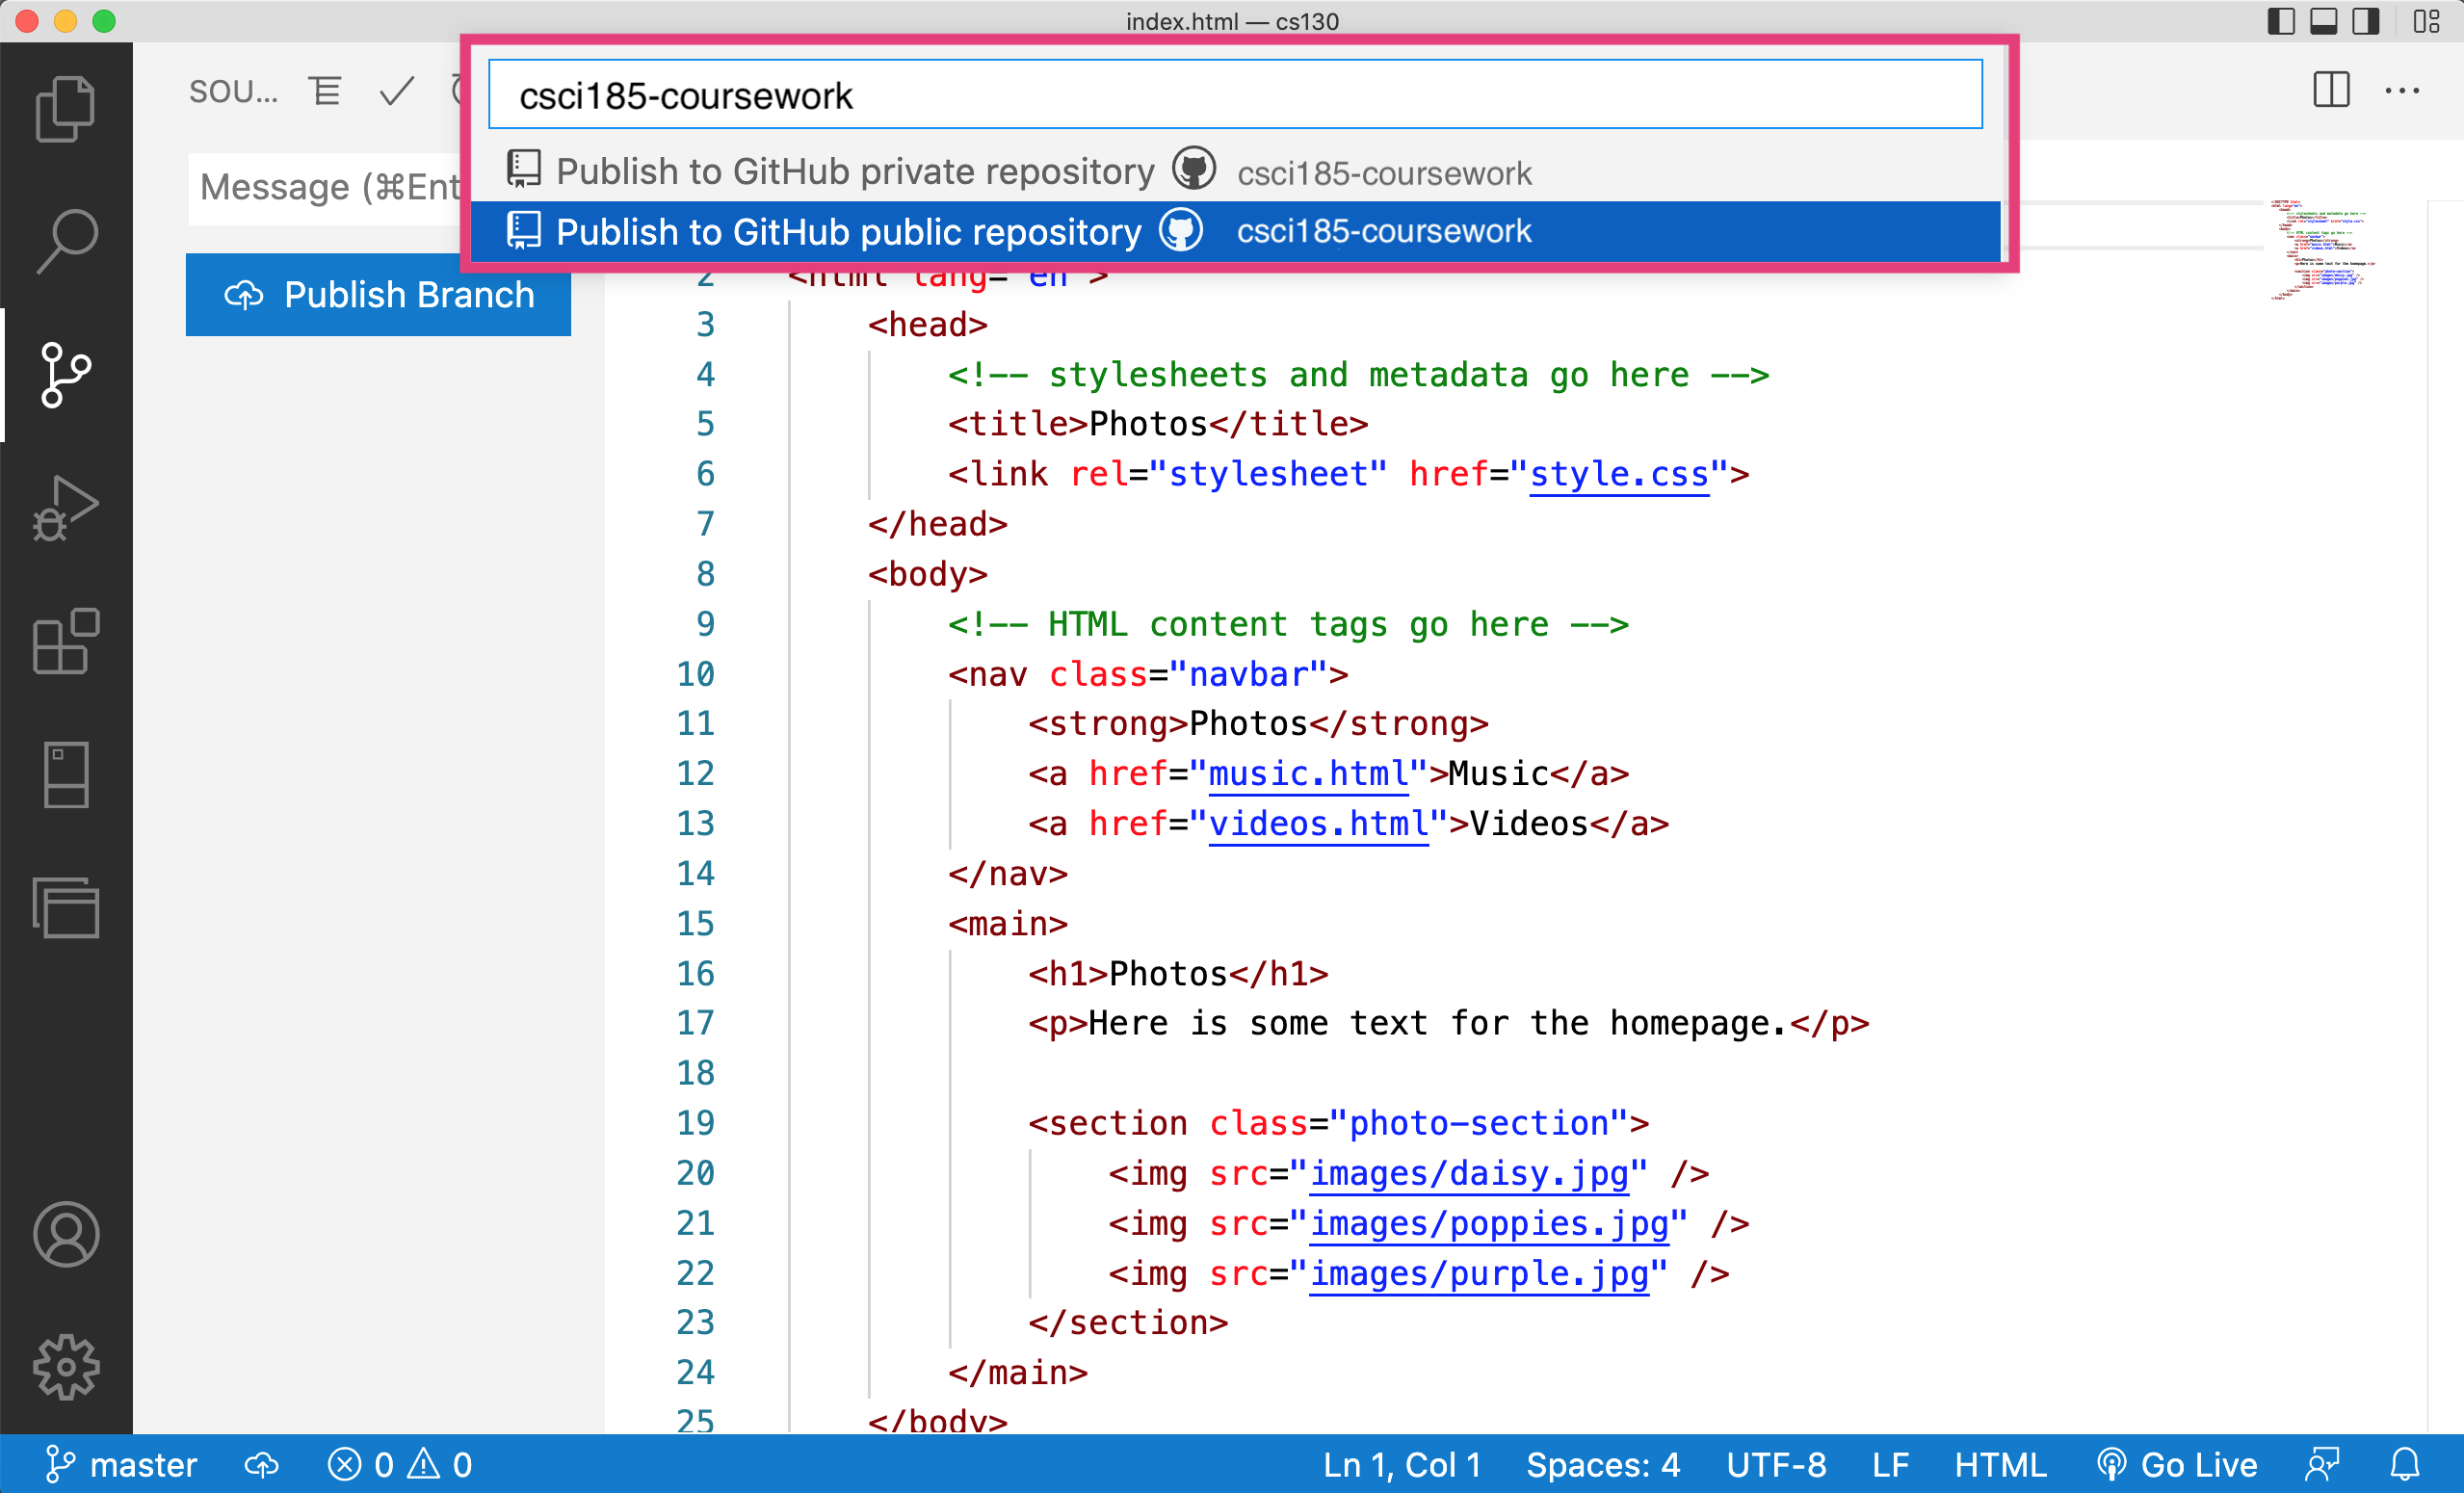
You will now create a new GitHub repository called csci344-coursework. Please ensure that you create a PUBLIC repository:
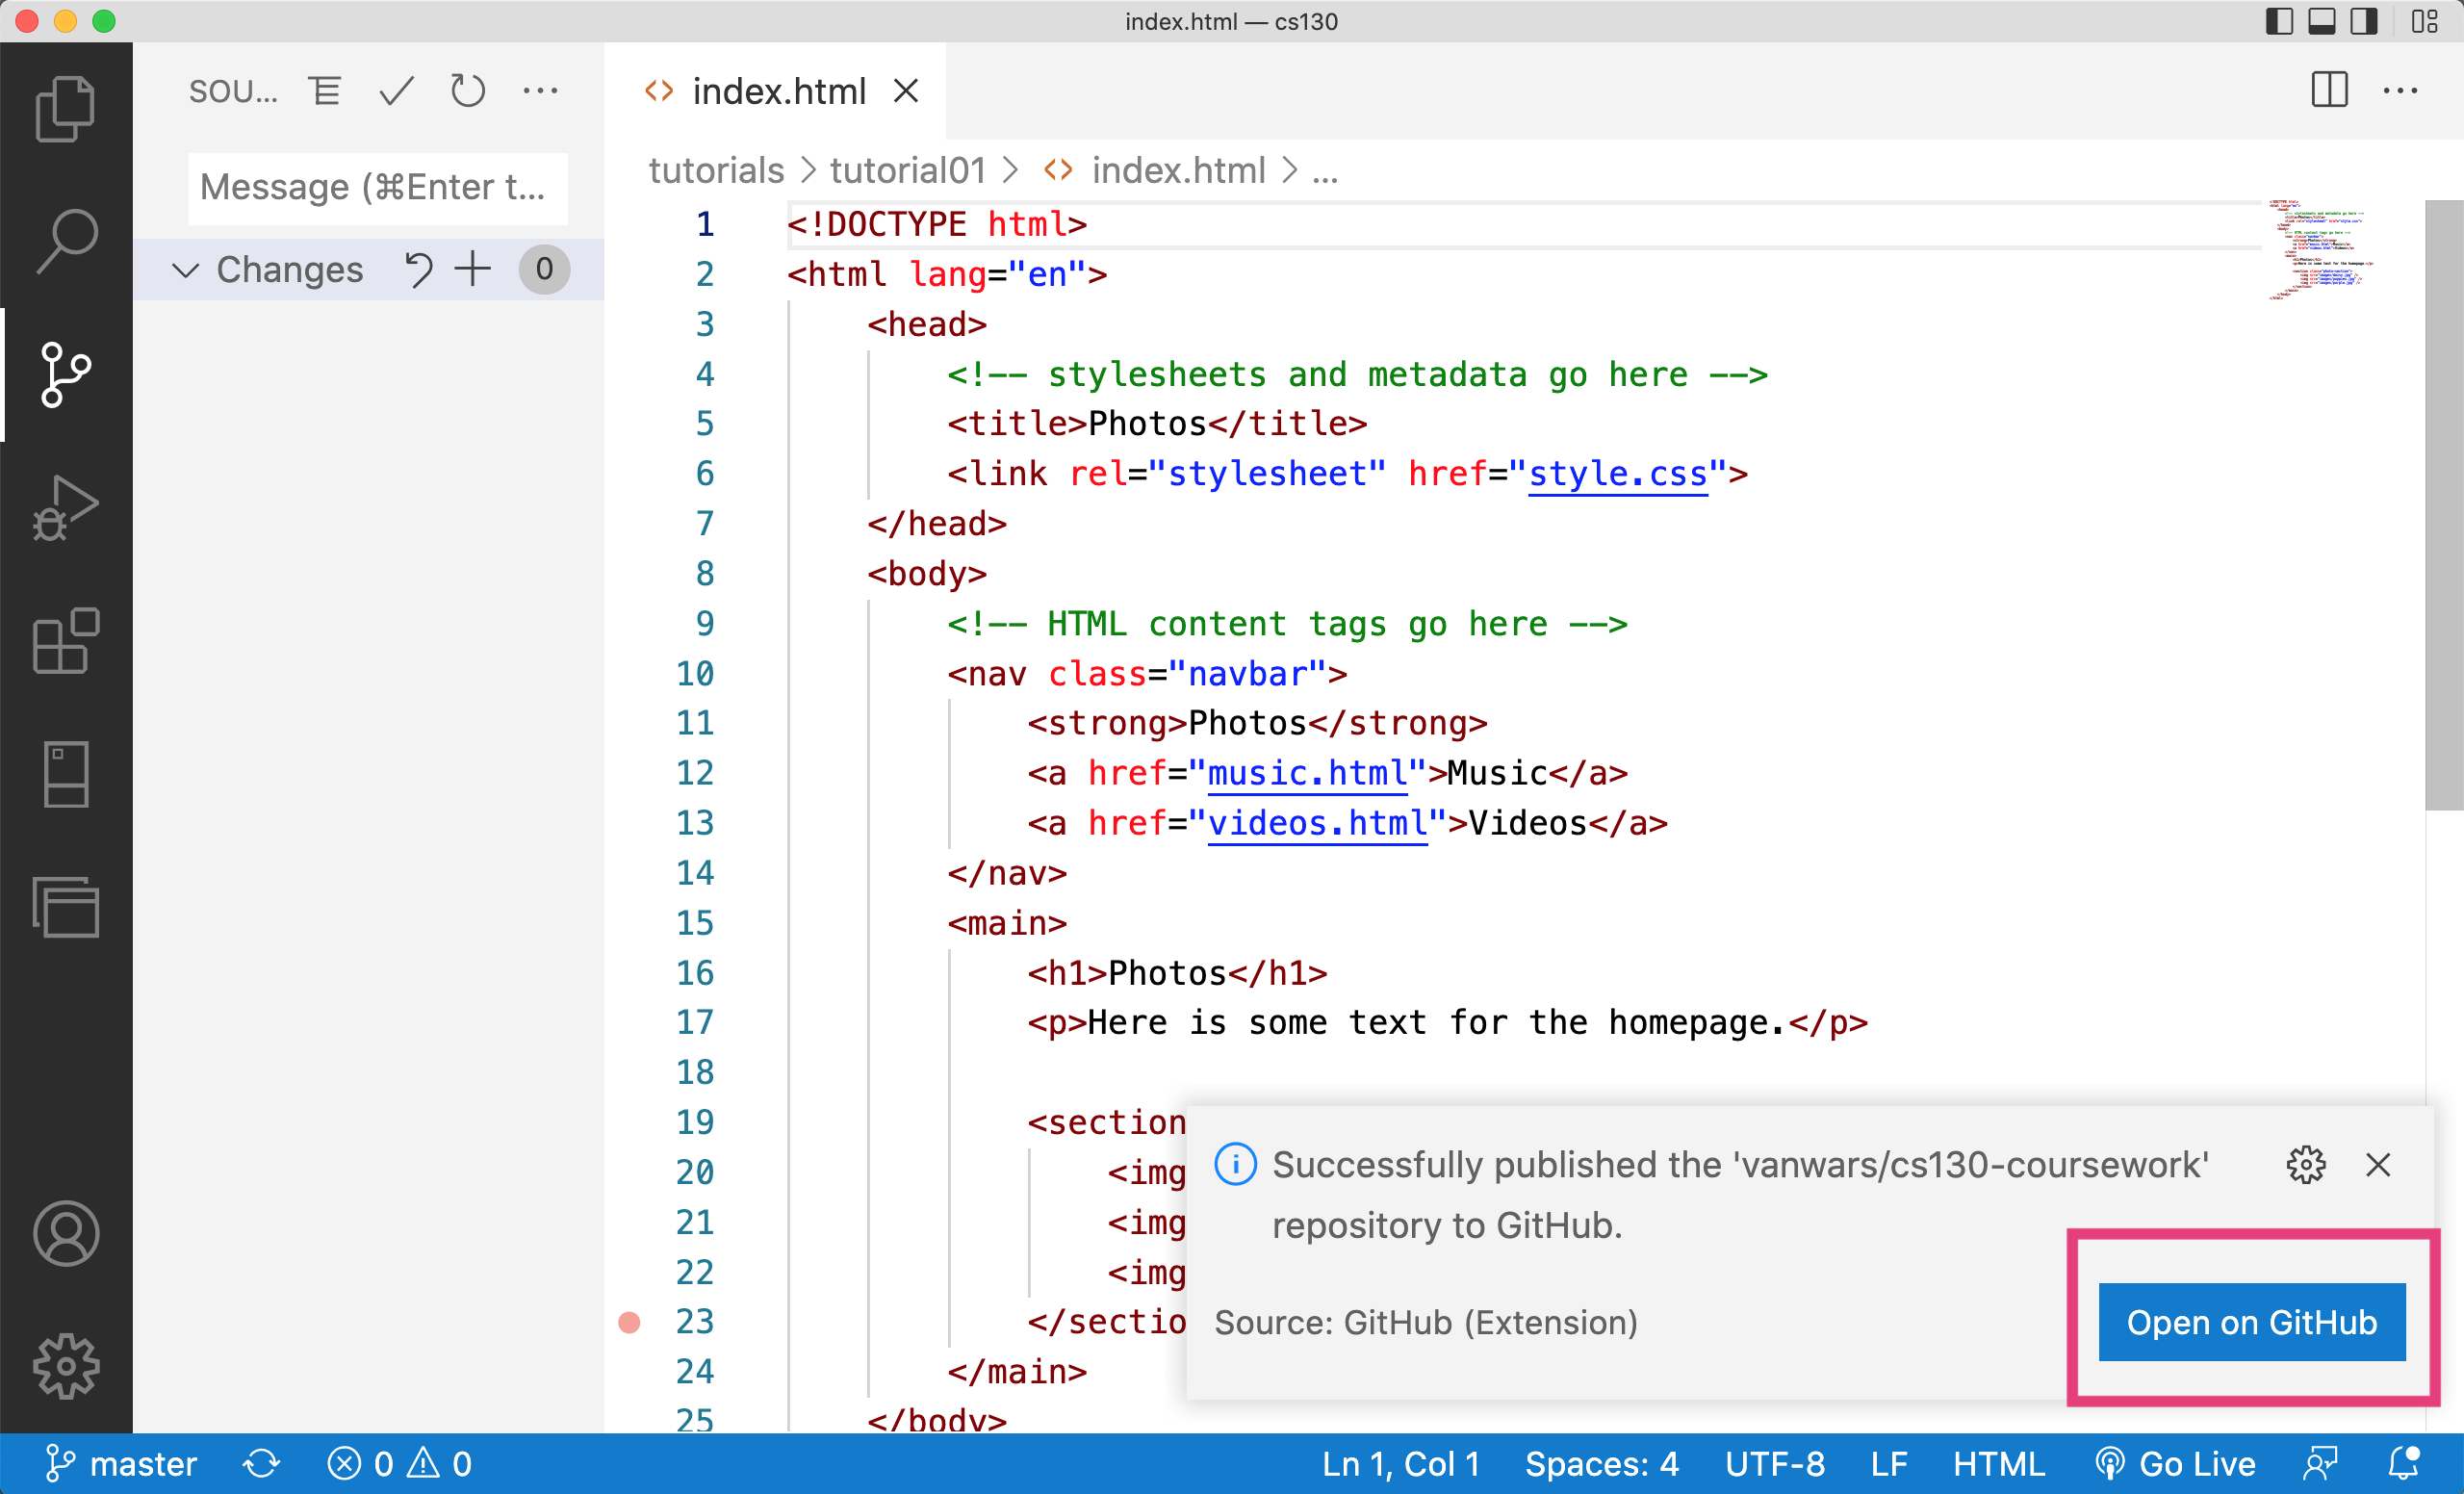
After VS code issues the “create repository” request to GitHub, it will give you a message indicating that your files are being sent up to GitHub. When the file transfer is complete, you will see a blue button that says “Open On GitHub”. Click that button.
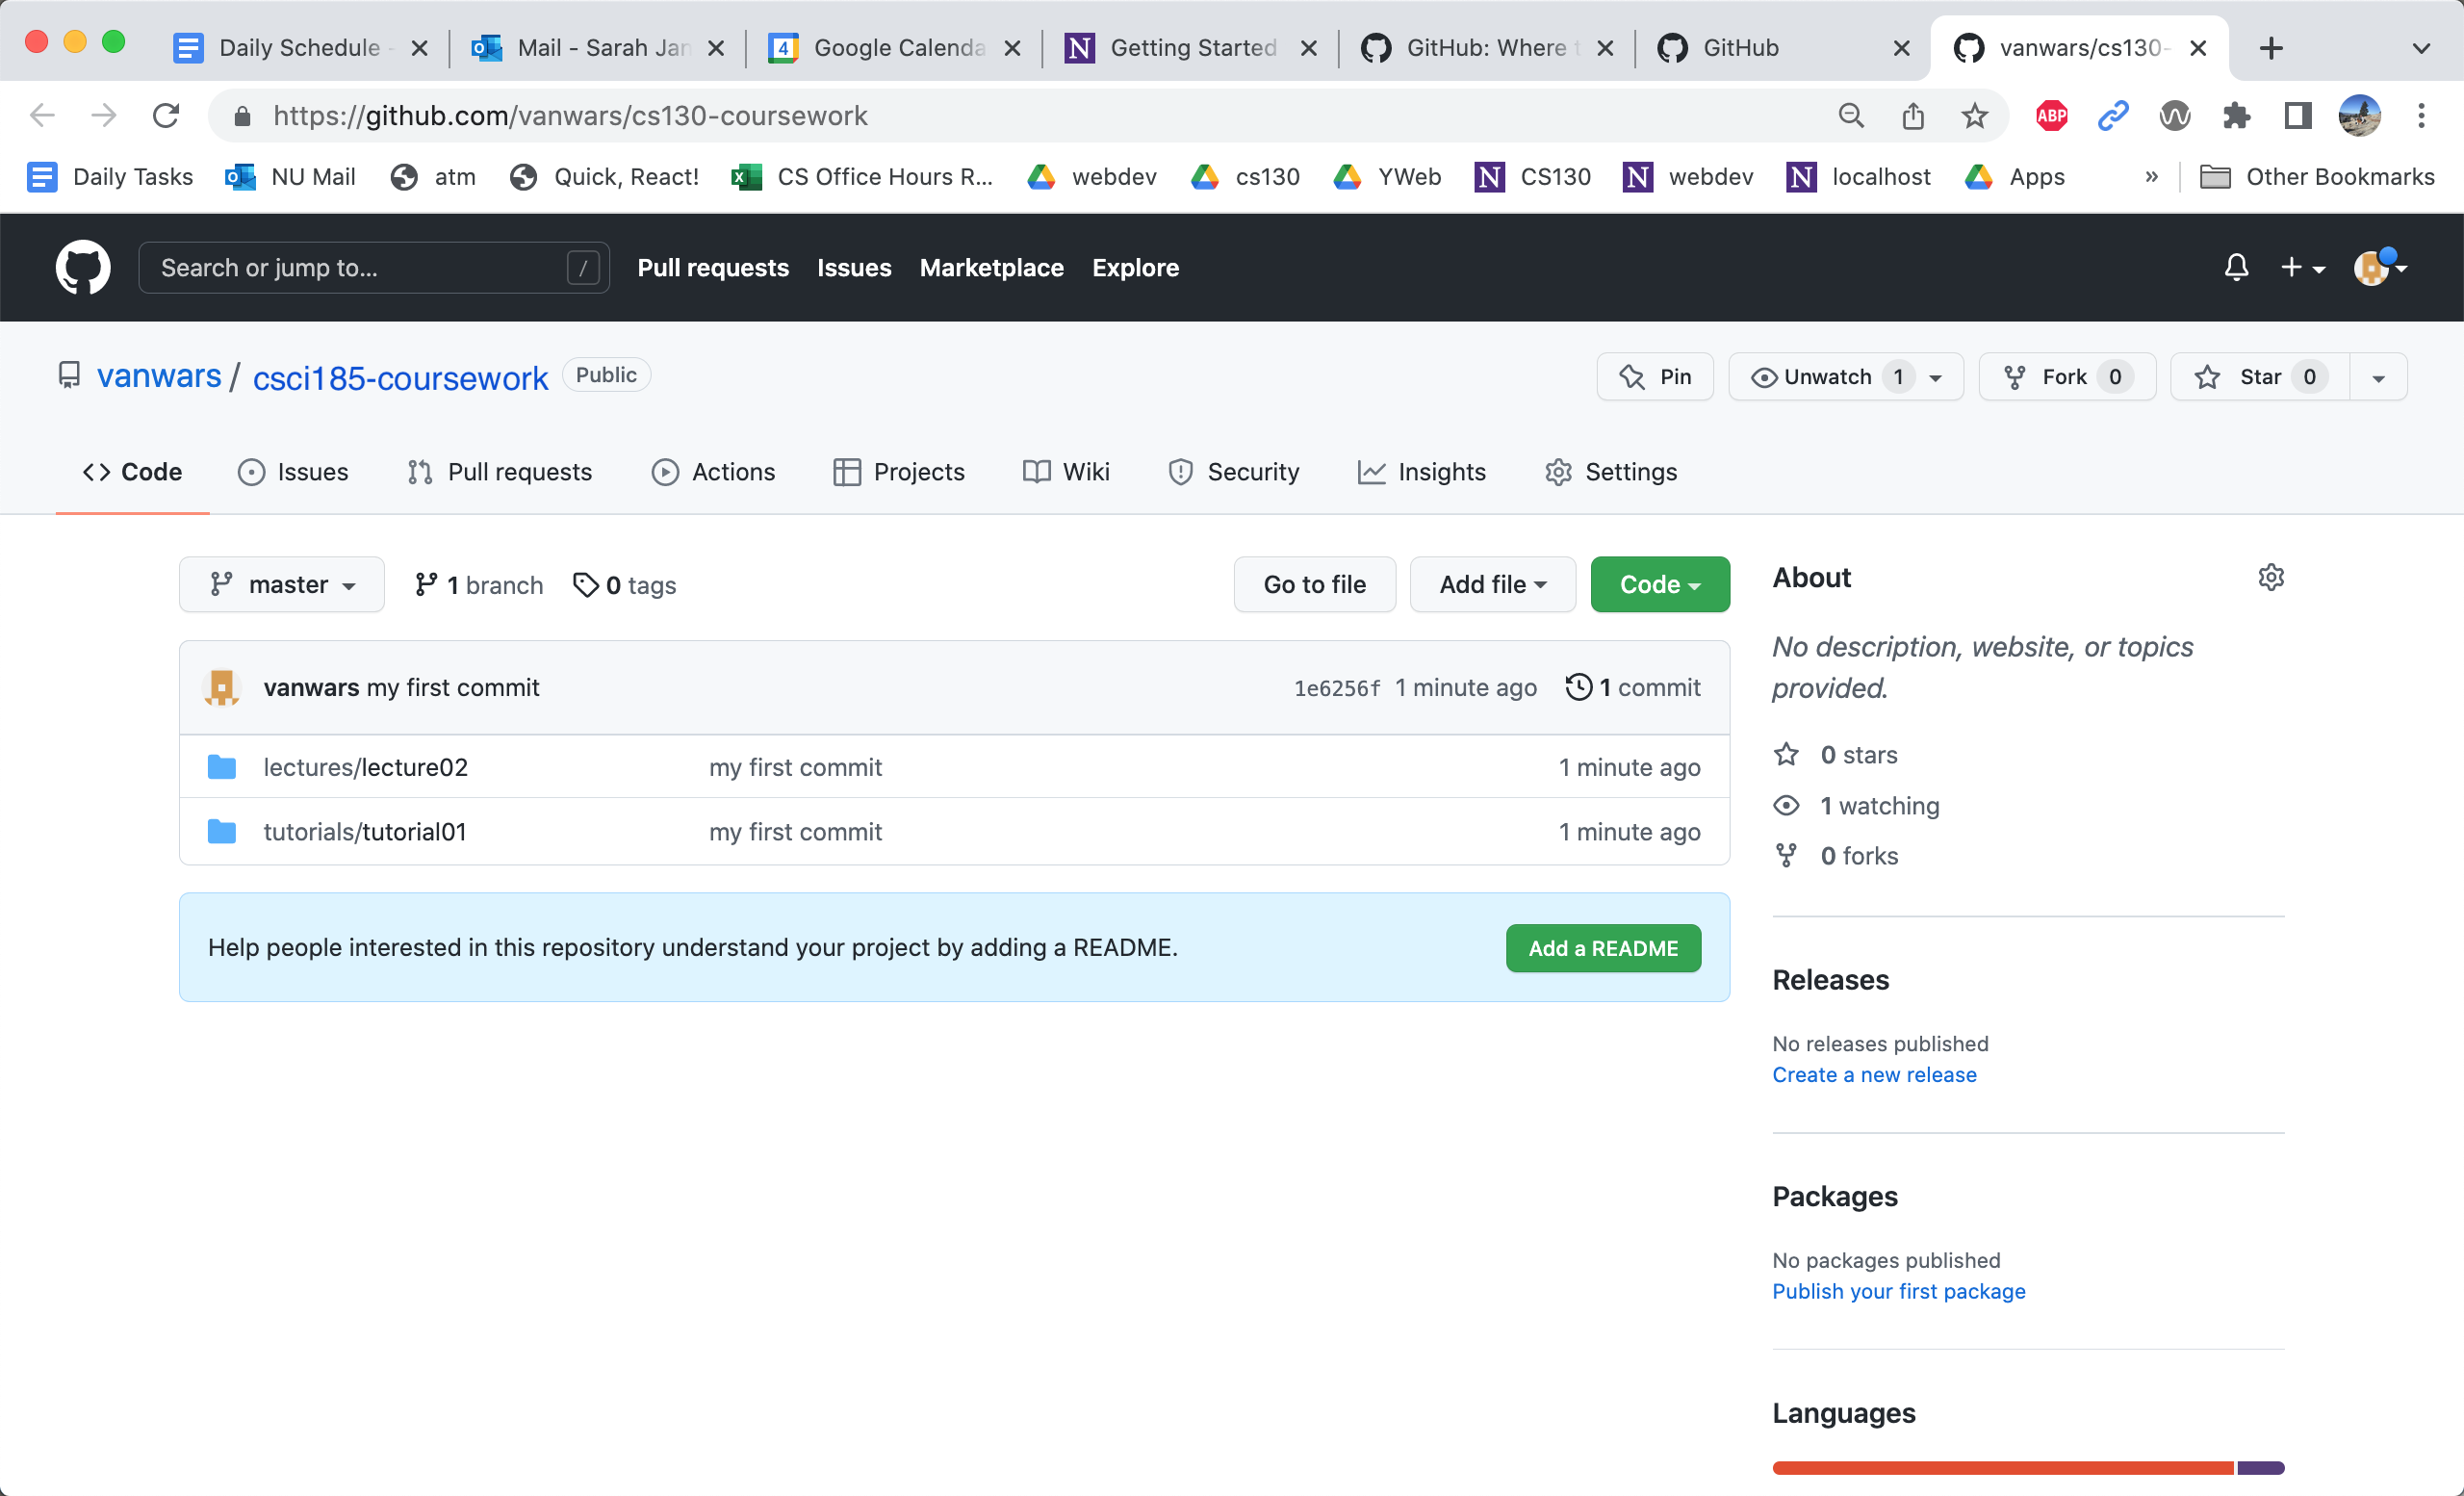
Clicking the button will open your newly created csci344-coursework repository and show you all of your files (which are now in the cloud):
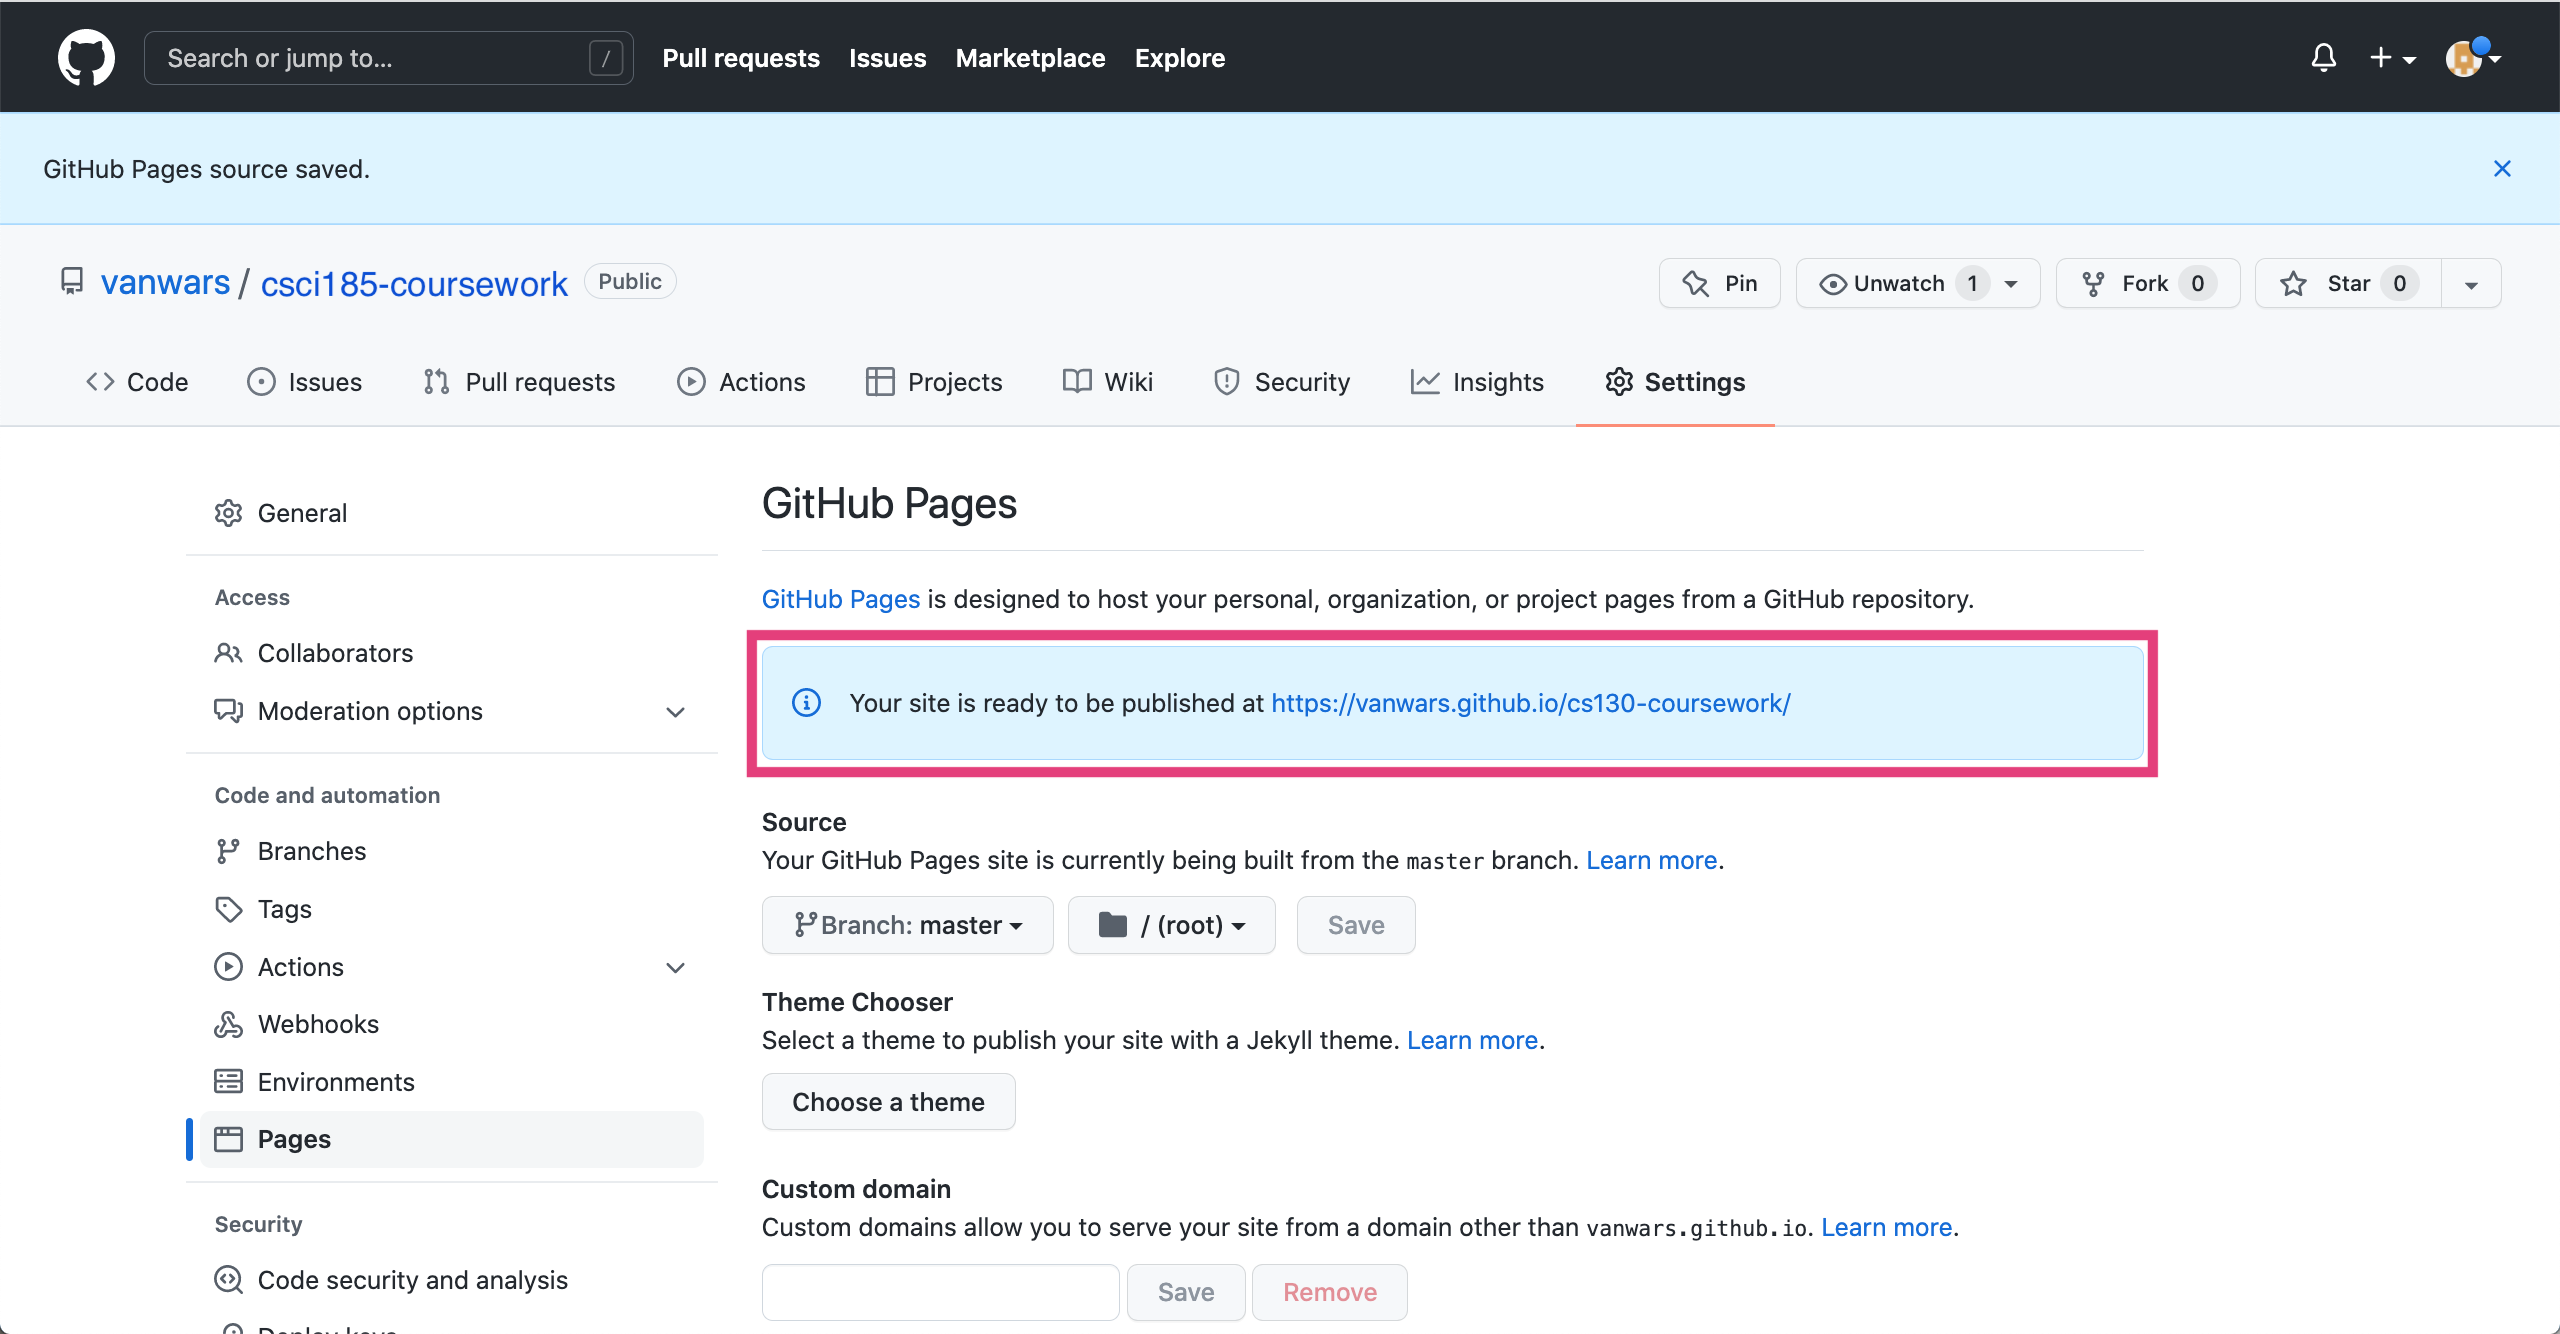
5. Finally, Configure GitHub Pages
GitHub also allows you to host pages. To enable GitHub pages:
- Go to your repository and click on the settings tab.
- Click the “GitHub Pages” link in the left-hand menu
- Click the dropdown menu that asks you to select a branch.
- Select the “master” branch
- Click “Save”
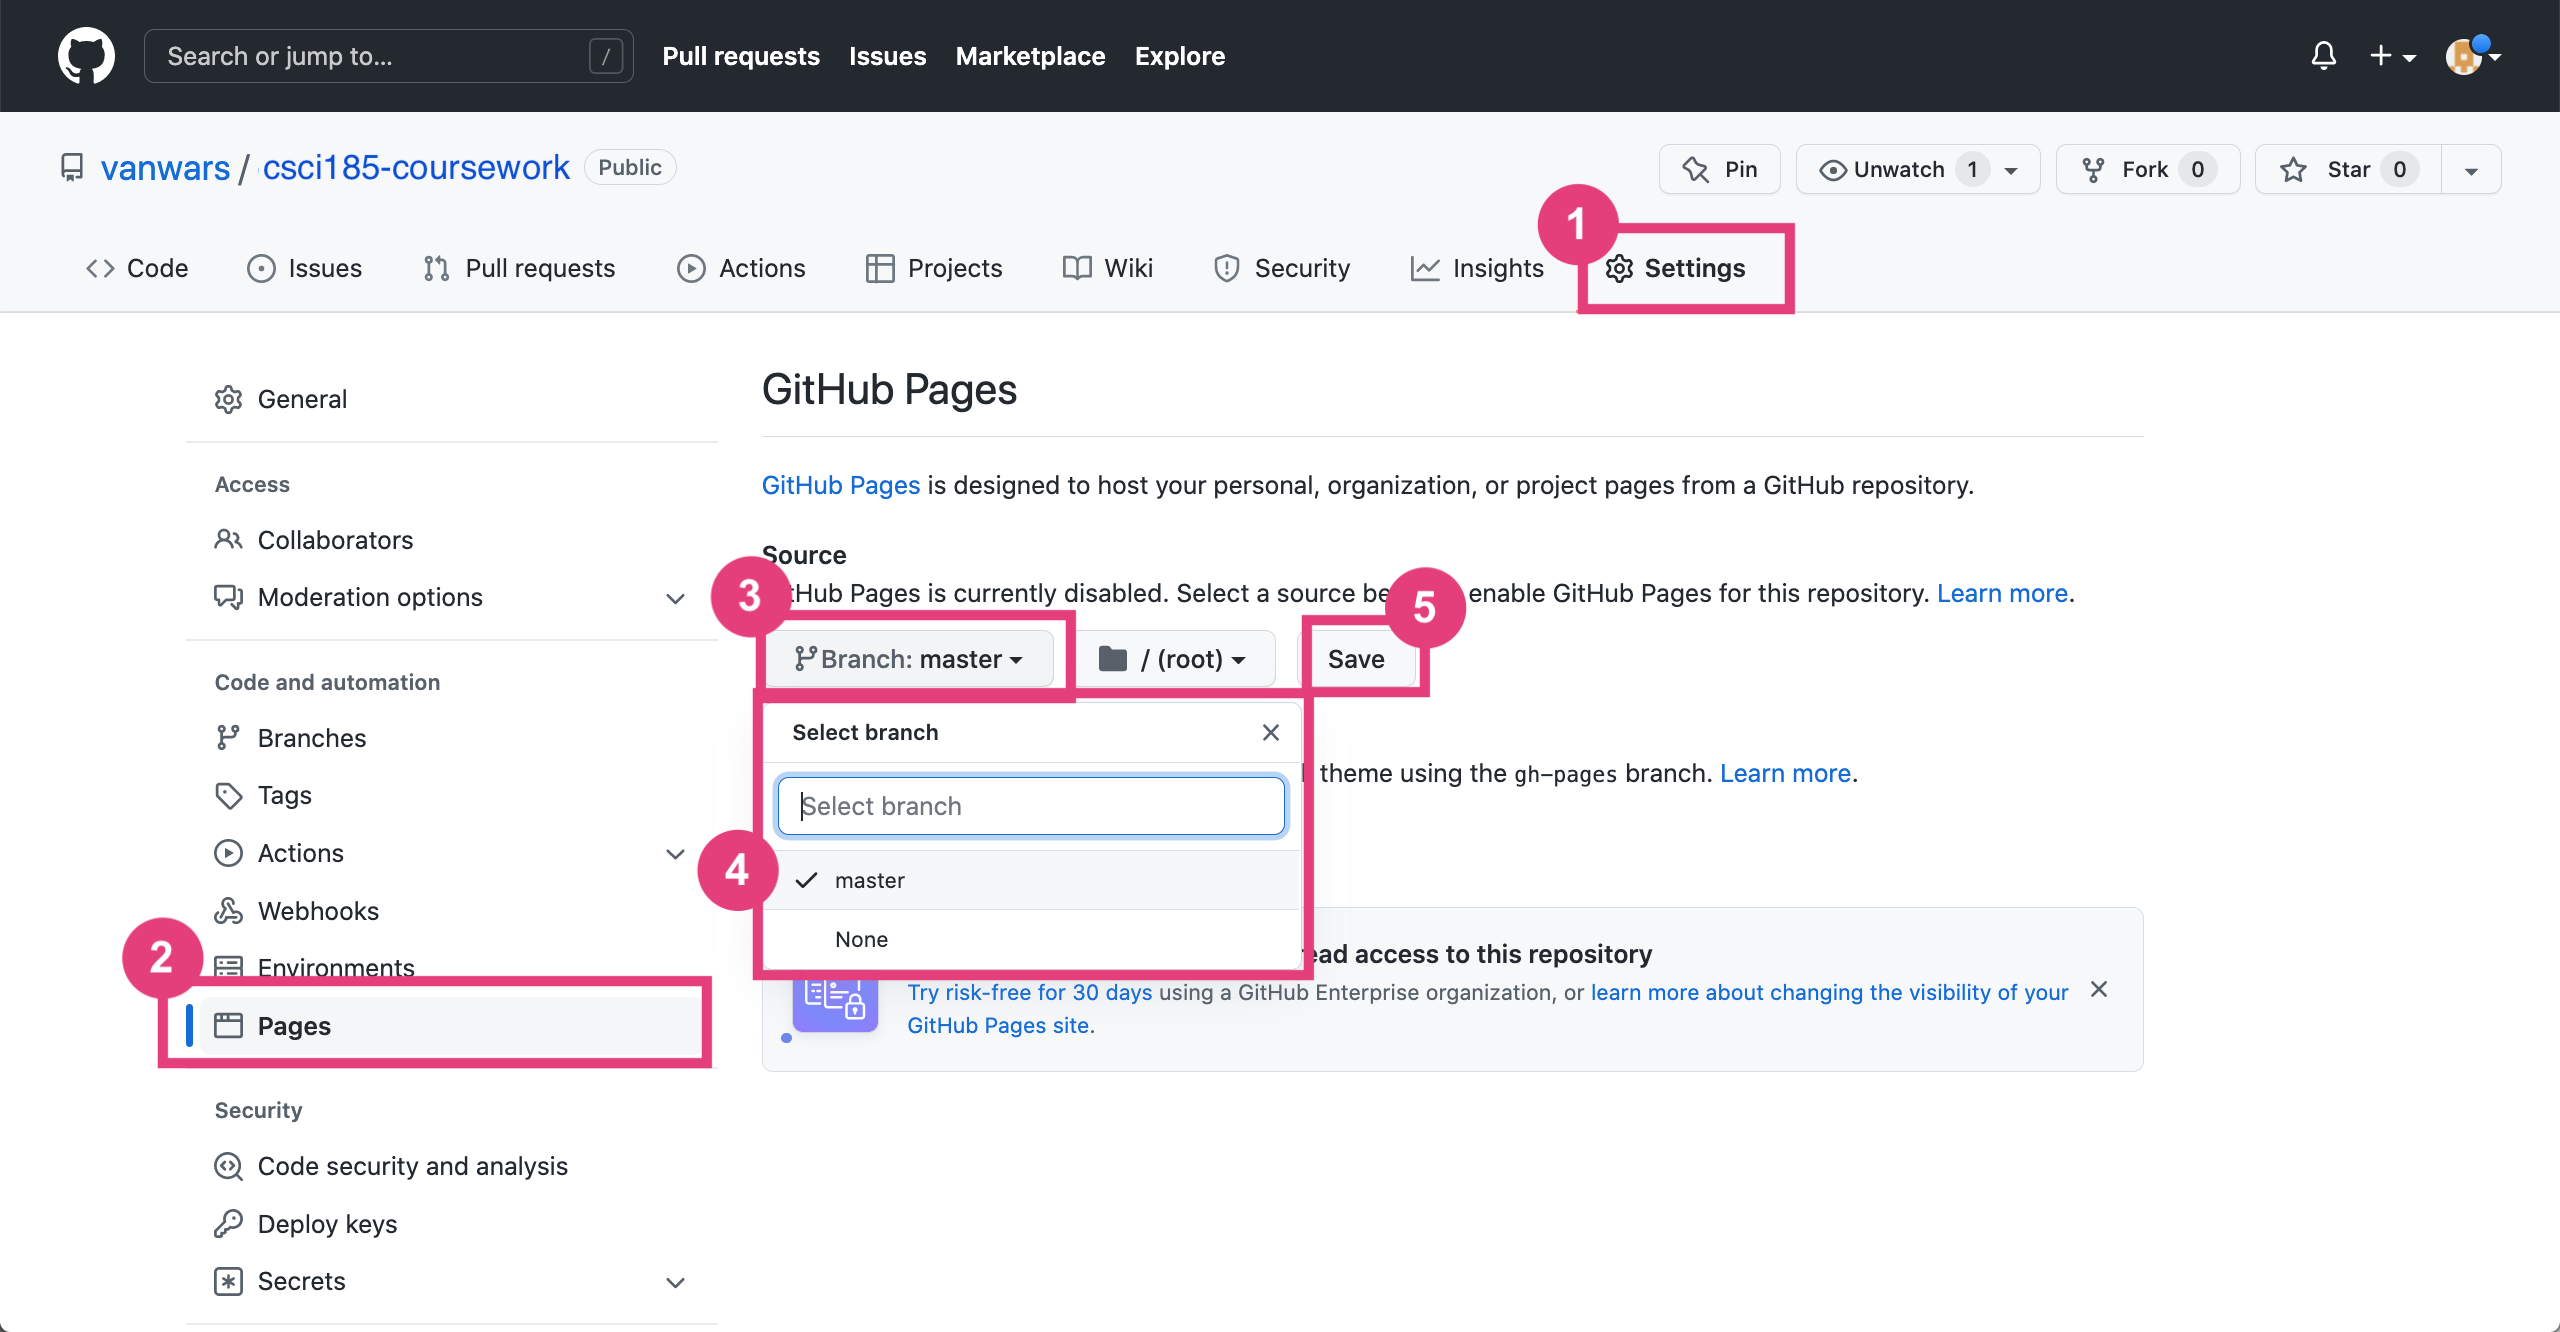
This will generate a link to your GitHub site.
A note on GitHub Pages
- It make take a few minutes for your webpage to display
- In order to preview the webpage you made in the
lecture03folder, you have to append the/lectures/lecture03/index.htmlfile path to the end of your github pages to indicate which file to display.